|
|
 |
|
Specifications:
● Resolution: WXGA
(1280 x 720)
● Display Type: Three 0.7" PolySi LCD: 16:9
● Brightness: 2,000 ANSI Lumens; Lamp Life
2,000 Hours; Replacement Lamp $395
● Contrast Ratio: 6,000:1 with Dynamic Iris and
Switchable Colored Filter
● Lens: 2:1 Zoom Lens; f/1.9 - 3.1, f/21.7 mm -
43.1 mm; Manual Zoom and Focus
● Lens Shift: Manual Optical Lens Shift (Vertical
and Horizontal)
● Keystone Correction: Digital
±
300
● Inputs: HDMI with HDCP x 1, Computer RGB x
1, Component Video x 1, S-Video x 1,
Composite Video x 1, RS-232 x 1
● Dimensions: 4.4" H x 15.5" W x 11.8" D
● Weight: 10.8 Pounds
● MSRP: $2,999; $1,999 Street USA
Available from
ProjectorPeople
|
|
Introduction
The PT-AX100U is a follow-on to Panasonic's successful
PT-AE900U from the Fall of 2005 (which I have owned for over a year now).
Both models are 720p LCD.
The Design
Spending some time with the AX100U has given me the impression that
Panasonic has been listening to their customers. They've added some nice new
features since last year's model.
One new feature with the AX100U is the ability to go bright in some modes
while also having the capability to move an internal color filter into the
light path. This allows for improved contrast ratio while maintaining
accurate colors with some modes.
The new model also includes support for stretching 2.35:1 movies with 720p
or 1080i input resolutions to the full 16:9 panel. This is useful for those
with 2.35:1 screens and anamorphic lens accessories.
The SmoothScreen technology with the AX100U is also sharper than what I saw
with the AE900U.
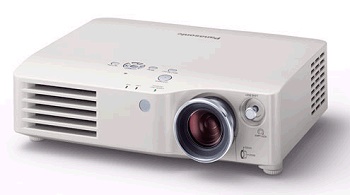
While the AX100U is larger than the AE900U, it is still small enough to be
easily portable for many situations where that can come in handy, like using
it for outdoor theater, using it in a different room, moving, shipping, etc.
With last year's model, there were many of us who purchased red filters to
mount on the projector lens, in order to give more contrast ratio with
balanced colors and to help give a more neutral gray for the darkest parts
of the darkest images. UHP type lamps are generally stronger in blue and
green than is called for by cinema standards, and the color filter chosen was
meant to balance the colors optically. Those adding an external color filter
would then calibrate the projector for the particular color filter they
chose. One of the downsides of doing this is that it can be a hassle to
remove or replace the filter and change the projector settings for different
situations. So, many of us would just leave the filter in place the vast
majority of the time.
Panasonic now has an internal color filter that will move into the color
path when going from some of the modes designed for bright rooms to the
modes designed for dark rooms, with calibration from the factory for each.
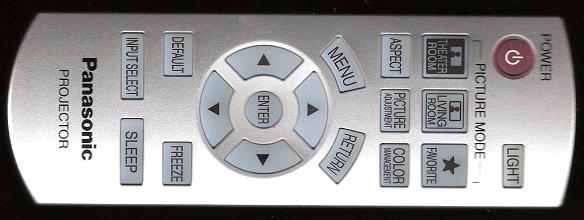
And all of this at the touch of a button on the remote. The remote includes
three buttons related to this feature. One marked, Theater Room, one marked, Living
Room, and one marked Favorite where the user can store settings
for three different modes. Pushing the Theater Room button will first switch
to the last dark room setting (Cinema 1, Cinema 2, Video, or Natural), and then
subsequent presses will cycle through the available dark room modes. And
likewise for the Living Room button with modes generally more appropriate
to brighter environments. These modes are Vivid Cinema, Normal, and Dynamic,
each of which either keeps or takes the internal color filter out of the
color path.
I generally switched between the Cinema 1 mode with the Theater
Room
button, and the Vivid Cinema and Normal modes with the Living Room button,
but also ended up saving those three in the favorites. The projector has a
feature called Light Harmonizer where the projector will sense the amount
of light hitting it and will adjust the images a certain amount on the fly based
on how much light it senses at any one time. However, I preferred to have
modes for each situation without leaving headroom for the projector to make
adjustments, and then to choose my own mode based on the lighting conditions
in the room (and especially lighting conditions at the screen) and the
current content I was watching. With the buttons provided on the remote,
Panasonic has made this easy to do.
Overall, I found the remote and menus to be very useful and easy to use.
While the remote doesn't include a lot of buttons, the ones that were
included were mostly the main ones I would want. From the button for
backlighting, to the dedicated buttons for the picture mode, to an
aspect ratio button, to buttons for going straight to the picture adjustment
menu or the color management menu, to general navigation buttons and then to
the button for selecting the input, this pretty much covered the
necessities.
Hitting the Input Select button brings up a graphic
like shown below that the user can then navigate.
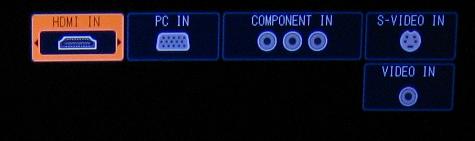
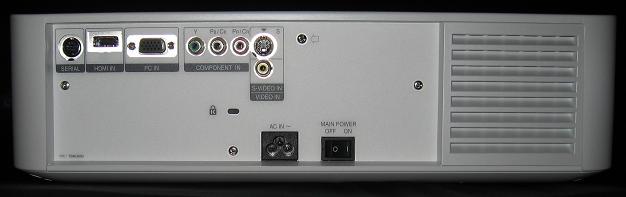
I think their use of graphics to show the physical makeup
of each input is a nice touch that some will find useful. The input jacks on the
back of the unit are shown in the photo below.
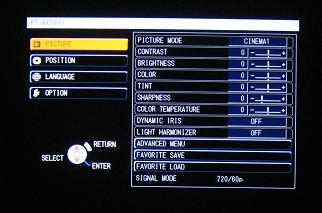
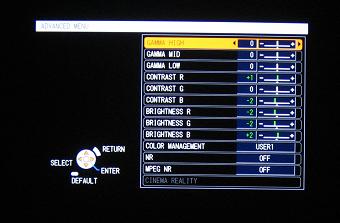
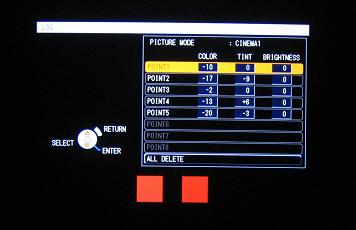
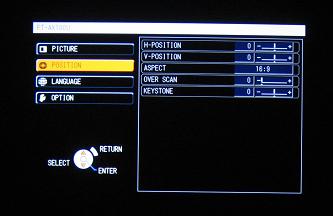
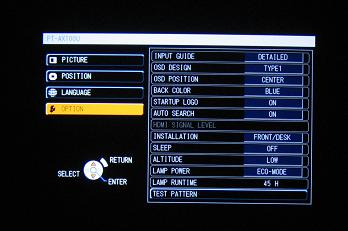
I found the menus to be pretty easy to use. Some of the
menus can be seen below.
Click Here to Go to Part II.
Terms and Conditions of Use
|