Product Review - Proton SRC-2000 Smart Remote Control with SDS-2000DBC Docking Station and SDS-2000SL PC Computer Programming Software - May, 2001
John Kotches - PC-Home Theater Editor
![]()
|
|
Proton SRC-2000 Remote Control with SDS-2000 DBC Docking Station and SDS-2000SL PC Software Specifications: SRC-2000 Smart Remote Control: SDS-2000DBC Docking Station Option: SDS-2000SL PC Software Option: |
|
Proton USA, Inc., 13855 Struikman Road, Cerritos, California 90703; Phone 562-404-2222; E-Mail [email protected]; Web http://www.proton-usa.com |
Set Phasers to Stun
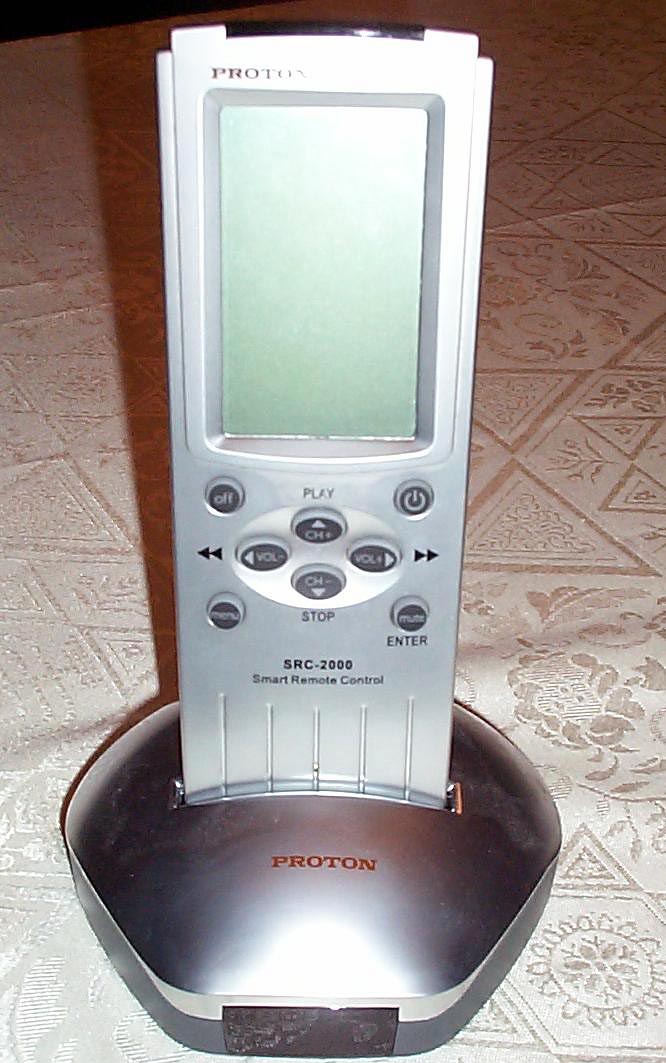
Silver is back my friends, in a big way. This particular silver goody is the Proton Smart Remote Control. I had been eyeing this beauty for a while when they agreed to send a review sample to Secrets. Proton sent out the full system: Smart Remote Control with docking station and their new PC software for programming. All told, the package retails for US$340 . . . about $40 - $50 less than its main competition, the new Pronto TSU2000.
It's all attractive, and my pictures don't do a great job of displaying how nice the remote (and its base) really look. The silver finish is tough to photograph - the base unit is even tougher as it's a bit darker than the remote itself.
I've also seen this remote included with a few high end components of late, but I'm not mentioning names!
Out of the Box
|
|
|
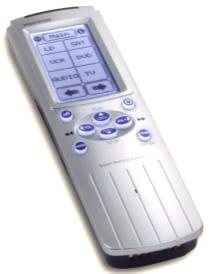
The system comes to you with no codes learned - you have to learn them all. While this might be tedious, it saves on space, and the SRC-2000 is tight, with only 1 MB of available memory on board. There are a total of 7 usable hard keys on the remote (physical keys). Each one of the hard keys is defined for each device, and there is no method to define them universally. The hard keys are Power Off, Power On, Vol +, Vol -, Chan +, Chan -, and Mute. The final hard key Menu is reserved to go back one level of menus. The remote has a blue backlight for the LCD display as well as the hard keys. It was impossible for me to capture that on digital film, but it looks very neat!
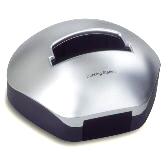
The docking station (photo above right) plus rechargeable batteries, and the software plus required cable for connection to your computer, came packaged separately.
Making the Remote Your Very Own
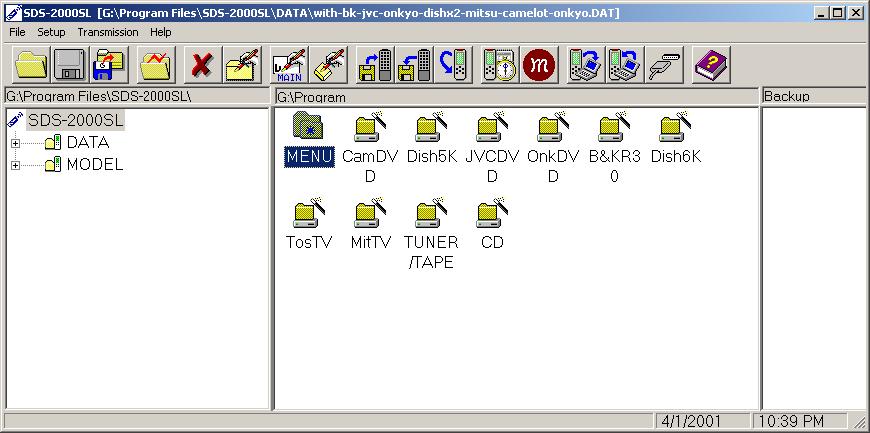
Now it's time to talk about programming the remote . . . a task that can be arduous, unless you know about the inherent flaws in the program at the time of this writing. First off, make sure your computer desktop is set to small fonts, because if you don't do this, the program will crash -- constantly. Once I set my desktop to small fonts (which also meant resizing my desktop), the program behaved properly. Second, you must use Comm-1. I have no idea why Comm-1 is hard-coded in this version of the program, but it is. Third, you have a hard limit of 35 buttons per device. That seems like a lot of buttons, and for a simple remote, it is. More complex remotes, such as those shipping with DVD players these days, have more than 35 buttons. I programmed three different Progressive Scan DVD Players onto this remote, and none of them had every button covered with the Proton. In addition to the 35 button limit, you have a 4 page limit per device, and a 12 icon limit per screen page.
The screen is not "bit addressable" as is the Pronto. And, you can't make your Proton remote look like the helm of the Starship Enterprise, as it's all squares and rectangles for buttons. There is an inherent advantage to this limited flexibility: setting up a new device and learning the codes can be done very quickly. After the first two hours were spent finding out about the Small Font bug, I was able to get everything completed in only another hour and a half (five devices). That works out to less than twenty minutes per device, including screen design and learning.
Note: You can click on most of the photos below to see larger versions. The photos are from the PC computer software, not the remote itself.
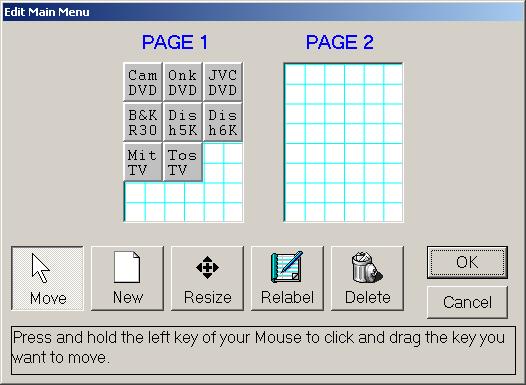
 Here's what the main screen looks like for my fully
programmed remote. Each folder icon represents a device, with
the exception of Menu. Menu is the list of devices
(aka Device Menu) to select for controlling. It's also
the starting point for the remote, and if you hit the Menu
button, you'll end up at the Device Menu. If your Device
Menu spans multiple pages, it will return you to whatever
page you exited the Device Menu from.
Here's what the main screen looks like for my fully
programmed remote. Each folder icon represents a device, with
the exception of Menu. Menu is the list of devices
(aka Device Menu) to select for controlling. It's also
the starting point for the remote, and if you hit the Menu
button, you'll end up at the Device Menu. If your Device
Menu spans multiple pages, it will return you to whatever
page you exited the Device Menu from.
 This
is what the Menu page looks like (photo at left) on my programmed remote.
I only have one page of devices presently. You can also see the
limitations of the program. I could resize the buttons to be a
better fit, which would give me more naming space for the buttons,
but this is adequate to my needs. It isn't the most lovely of
displays either, just text on a button.
This
is what the Menu page looks like (photo at left) on my programmed remote.
I only have one page of devices presently. You can also see the
limitations of the program. I could resize the buttons to be a
better fit, which would give me more naming space for the buttons,
but this is adequate to my needs. It isn't the most lovely of
displays either, just text on a button.
![]() You aren't limited to text labels. They can be either
text or icons. You can't mix and match, but arrow keys (Up, Down,
Left and Right) are available in Text Mode.
You aren't limited to text labels. They can be either
text or icons. You can't mix and match, but arrow keys (Up, Down,
Left and Right) are available in Text Mode.
The Icon Mode (photo at left) has quite a few useful and cool icons that are pretty commonly understood, and include transport controls, volume controls and several other icons. (Note to Video Editor: Too bad they don't have a DTS icon :-) ).
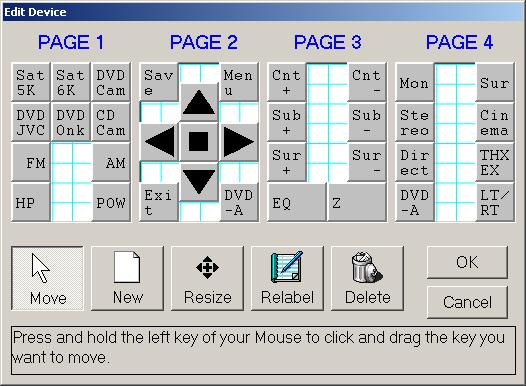 How about a look at the device page (photo at left) for my
preamp/processor, the B&K Reference 30? It's a four page beast,
and the page that is used the least is also the only page that
requires two scrolls to access. As with the Device Menu
mentioned earlier, the Device Control leaves you at the
same Control Page you were at when you last used the device.
How about a look at the device page (photo at left) for my
preamp/processor, the B&K Reference 30? It's a four page beast,
and the page that is used the least is also the only page that
requires two scrolls to access. As with the Device Menu
mentioned earlier, the Device Control leaves you at the
same Control Page you were at when you last used the device.
I've opted for more buttons per page to try to keep them grouped as logically as I could manage. This is a fully set-up device, utilizing all 35 possible buttons. One warning, be careful if you vary from the input name on the Pre/Pro, because it can be confusing as all get-out as to what is plugged in where. You'll just have to trust me on this one!
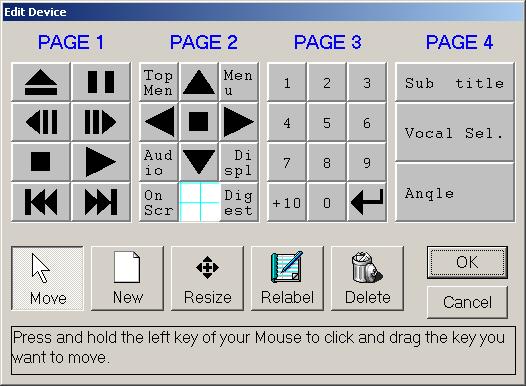
I'm not sure if you'll agree that this is the best way, but the multiple DVD Players that I have had in and out of late ended up with similar configurations. Also, for reference, I'm showing my Dish receiver configuration, which is much simpler.
|
|
|

Transferring Configurations and Teaching Your Old Dog a New Trick
Getting your remote fully programmed occurs in 4 steps. First is device configuration. Second is transfer of the configuration from your computer to the remote control. Third is learning on the remote, and finally, it's transfer back to the computer for safekeeping. If you're brave and don't mind living dangerously, you can omit step 4 (saving your completed configuration plus remote codes to a computer file).
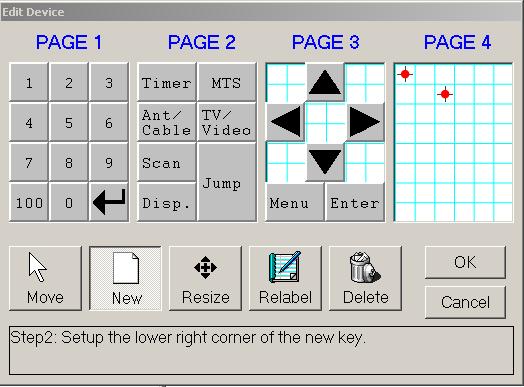 To configure a device, you lay out the buttons on
a grid, by selecting the top left boundary and the bottom right
boundary for the button. Once complete, a button appears that
can be labeled with text or icons of your choice. You repeat
this process as necessary to build up each page of a devices configuration.
To configure a device, you lay out the buttons on
a grid, by selecting the top left boundary and the bottom right
boundary for the button. Once complete, a button appears that
can be labeled with text or icons of your choice. You repeat
this process as necessary to build up each page of a devices configuration.
Once completed with all your device configurations, it'll be time to transfer it out to the remote. Here we run into another area I think could stand improvement within the program. Communications is limited to no more than 9600 bps, and when the program is in use, it chews up all available system resources on a single CPU system. I'm lucky to have a multi-processor machine at home; otherwise the system would be nearly unusable during transmission. The transfer time is 5+ minutes for my configuration, which I think is a touch slow!
To transfer the configuration from your PC to the Proton, hold the Menu button down. When presented with the Setup menu on the remote, select option. This has two options, Receive to receive a configuration from the PC, and Send to send a configuration to the PC. On the PC side, you select the "Upload to Remote" Icon (Arrow points from PC to Remote) to upload, and select the "Download from Remote" icon to download the remote's configuration. Here we're going to select Receive on the remote and use the "Upload to Remote" icon in the program.
To learn device codes on the remote, you hold the Menu button down for about 3 seconds to access the remotes Setup Menu. The Program Options brings up several choices, including Learning. After selecting the Learning option, your Device Menu is displayed. When you select your device to learn codes from, you'll have a series of screens to work through. First is a screen for your hard keys. You're prompted for each key in order, with the exception of Menu which is always used to back up one level of menus on the remote. If you're like me, you want Vol + / Vol - and Mute to always act on your preamp/processor (or receiver). I kept multiple remotes handy to program each device in turn. After the hard keys are programmed, you are walked through each device-specific page that has buttons programmed. Note: To relearn individual codes, you use the same procedures, but when on the appropriate page, you simply hit the individual button to relearn.
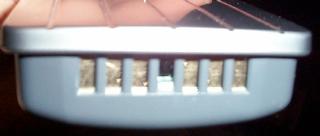
A photo of the bottom of the remote is shown below. The bottom contains the recharging contacts for the NiMH batteries + docking station option, and between the contacts is the IR Sensor for learning remote codes.
 The
remote learns codes in a very short time, so you have to be careful
when learning repeated keys (like volume +/-). Make sure you
keep the key depressed until the Learn beep is sounded. Otherwise, you'll only learn the code for one step. Once you learn
about this idiosyncrasy, it's pretty smooth sailing!
The
remote learns codes in a very short time, so you have to be careful
when learning repeated keys (like volume +/-). Make sure you
keep the key depressed until the Learn beep is sounded. Otherwise, you'll only learn the code for one step. Once you learn
about this idiosyncrasy, it's pretty smooth sailing!
After you've repeated this for all buttons, a few hits of the Menu hard key exits you from learning mode, and you're ready to test the remote. After you've tested the codes learned, you're ready to transfer the configuration back to the PC for safekeeping. Return to the Setup Menu / Duplicate Options / Send to transfer data back. A quick press of the "Download from Remote" icon on the PC, and you're receiving data.
I don't recommend programming the Proton without the PC software, because it's not very easy to do. In addition, you cannot access individual remote codes as you can with other universal remote options. You also can't assign punch-through or default values for the hard keys, so for each device, if you want your preamp/processor to control the volume, you need its remote control available.
Taking it One Step at a Time, or How I Learned to Build Macros Without Having a Heart Attack!
This is another spot where the program was less than stellar, i.e., building macros. You're limited to a dozen macros for your entire audio/video system. I can't say what things are like for your setup, but mine could use a few more macros than twelve.
Entering the macros isn't perfectly obvious, but it isn't terrible either . . . .
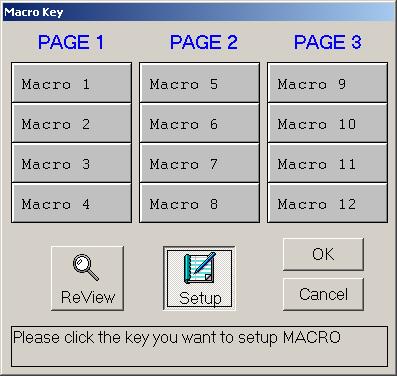 When you select the Macro Button, this is the screen
that comes up (photo at left). Selecting Review allows you to look at a
configured macro, and selecting Setup allows you to configure
a macro.
When you select the Macro Button, this is the screen
that comes up (photo at left). Selecting Review allows you to look at a
configured macro, and selecting Setup allows you to configure
a macro.
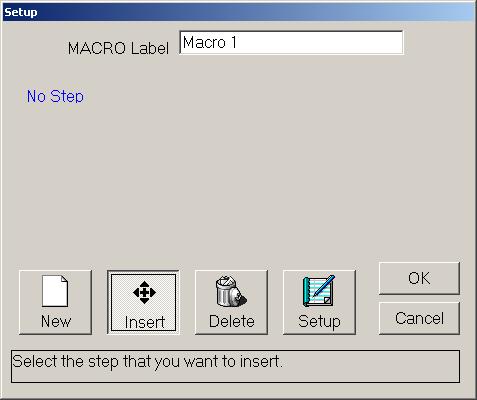
From the pictured screen (below left), you can then add a New step, Insert a step ahead of the highlighted step, Delete a step or Setup a step. Selecting New makes you ready to begin programming a macro.
|
|
|

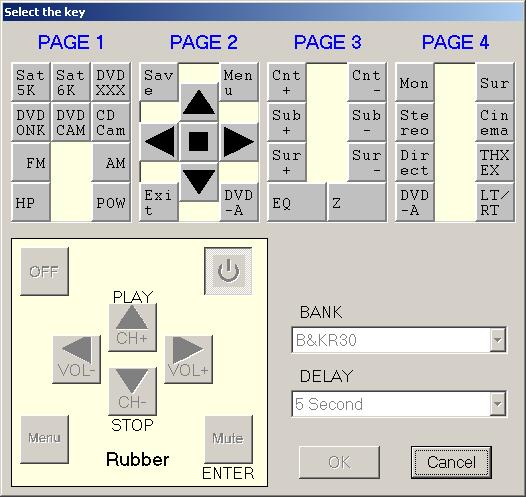
This is macro programming at its simplest (shown above right). You select the device (called Bank), select the key you want to depress, and then the delay time after hitting the key before moving on to the next step. Repeat ad infinitum, up to the maximum number of steps for a macro, which is undocumented. It isn't the most elegant method, but it is serviceable.
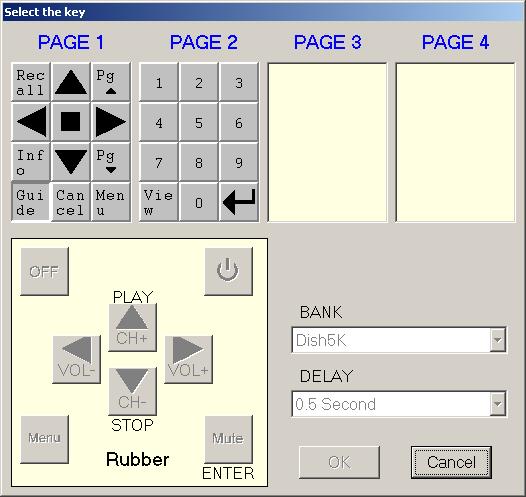
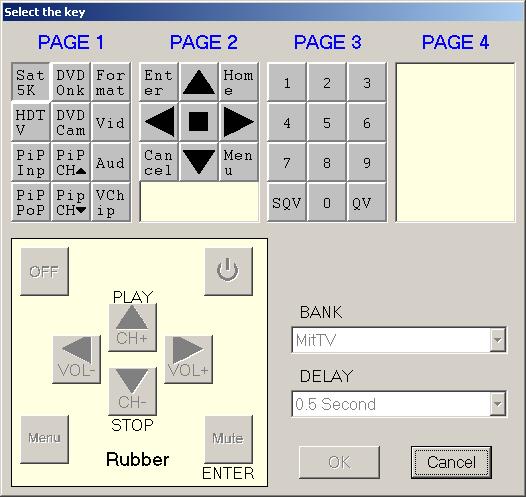
Where macros break down is when a manufacturer doesn't provide a discrete code for a function. For example, Dish doesn't have discrete codes for Power On/Off, so it is impossible to "know" the state of the satellite receiver. Thus, it's impossible to create a reliable macro involving the receiver, because you don't know if the power toggle will be turning the receiver on, or powering it off.
Below is a series of screen shots showing a macro to use the satellite dish in my system at the time this review was written. Step 1 uses a discrete power-on code to power up the TV, Step 2 powers on the Pre/Pro via discrete power on, Step 3 selects the appropriate input on the Pre/Pro, Step 4 selects the appropriate input on the TV, and Step 5 calls up the program guide on the satellite receiver. Note that with discrete codes, I'm certain of the state of the TV and Pre/Pro but not of the satellite receiver, so if its off, Step 5 does nothing.
 |
 |
 |
|
|
 |
A few things to Point Out Before Closing
The SRC-2000 ran for about 4 - 5 days of heavy usage between recharges, and my wife was able to use the remote with minimal instruction, so it's fairly intuitive to use for a novice. The remote was able to control devices at about 600 in both the vertical and horizontal planes. My room isn't conducive to the "bounce it off the walls" trick, so I can't tell you how it does for bouncing the IR signal. If it works for you, it's icing on the cake.
Some annoyances I haven't mentioned yet:
- The backlit display turns off about 2-3 seconds quicker than is optimal.
- To bring the remote back to life from its off state, you need to hit the Menu button. I would prefer to hit the LCD display over the page scroll buttons so that I don't exit the device I'm currently using.
- You can't jump from component to component as you can with some competing remotes. For example, on my other programmable remote, when I select a device from the main menu, I select the input on the Pre/Pro, then go to the first screen page for that component. This capability cannot be duplicated on the Proton SRC-2000.
That's a Wrap!
In the end, I have to give this universal remote a mixed review. The product comes in a very attractive package, and is competitively priced. However, the software provided is obviously in its early phases and has much room for improvement in usability. It also needs better documentation. The nice thing is that software upgrades will probably come down the line, and you will be able to get them without having to upgrade the remote control itself.
If you're only a novice user, and don't want to make programming your remote a career, the SRC-2000 can handle your needs very well. The simple setup is quick and efficient if you use the information I presented above. Further, the learning is straightforward once you understand the sequence for programming a new device. The usable range of the remote is at least as good as its primary competitor.
If you're looking for ultimate configurability, at this time the SRC-2000 is not for you. Maybe sometime soon though.
- John Kotches -
© Copyright 2001 Secrets of Home Theater & High Fidelity
Return to Table of Contents for this Issue.
Magazine Publishing Solutions by