Introduction
I think most home theater aficionados know how
important a good subwoofer is to the movie experience.
This is especially so with action films. Digitally
synthesized special effects add some very deep frequencies to those
explosions, gun shots, car crashes, and even fist fights (isn't it great to
be male?!)
So, you just installed that nice sub over near the
right corner of your home theater, plunk in the latest Charlize Theron or
Kate Beckinsale kick-butt DVD - what the heck happened to Schwarzenegger and
Stallone? - sit back, and . . . whoops, where is all the bass?
Welcome to the world of, "OK, I've got the good
speakers and subwoofer, now how do I fix the problem of this lousy room?"
Room EQ
To resolve, or at least mitigate, the drawback that walls,
floors, ceilings, windows, and doors don't benefit our search for audio
nirvana, but instead, always seem to subtract from it, manufacturers have
added EQ to surround sound receivers, and to subwoofers.
This EQ, or Equalization, is a series of "bands" along
the audio spectrum, usually spaced out at percentages of an octave. Not all
of them go through the complete range of human hearing (20 Hz to 20 kHz),
but some of them do.
In receivers, even if the EQ covers the entire audible
spectrum, usually the low frequency bands are sparse, and therein is the rub
for those of us who crave deep bass. We need more EQ bands to cover the 20
Hz to 80 Hz range, where most subwoofers operate.
Even the subwoofers that sport built-in EQ don't usually
have many bands. Some only have one, in fact, and that isn't enough.
So, what to do?
R-DES
Outboard subwoofer EQ is the answer, and several
manufacturers have stepped up to the plate and delivered. AV123, with their Onix R-DES (Rocket Digital Equalization System), is one of those.
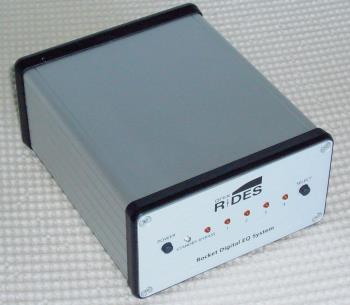
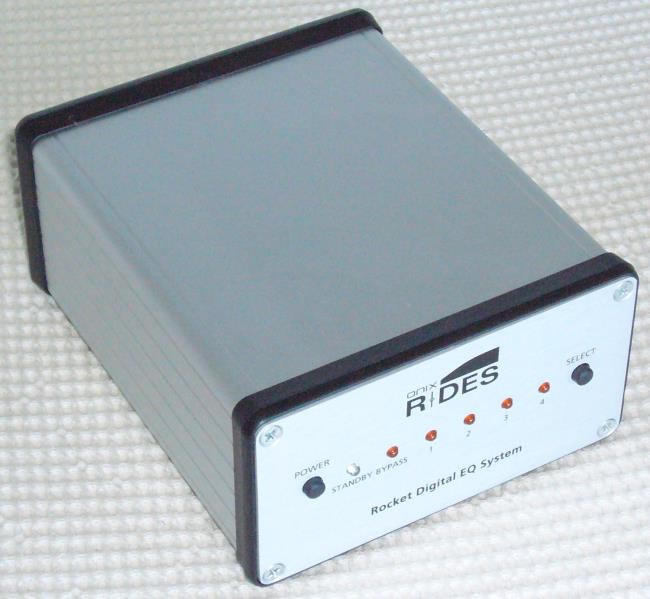
R-DES consists of the EQ box, shown below, a software
disc that you install on your PC for configuring the EQ curves, a wall wart
DC power supply, and a USB cable.
The front of the box has a power button, LEDs to
indicate Standby, Bypass, EQ Curves 1, 2, 3, and 4, and a button to select
which of the four curves you want to use.
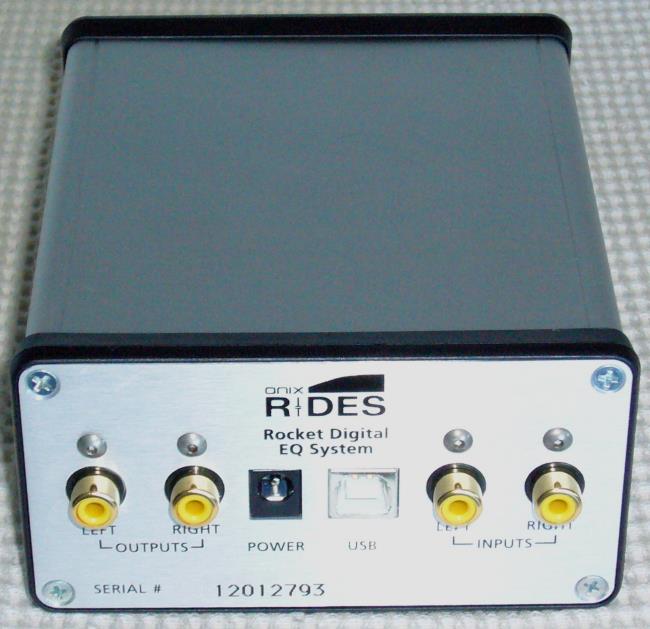
The rear panel has a set of stereo RCA inputs and
outputs (use one channel if you have just one subwoofer), an input for the
wall wart power supply, and a USB jack.
First, you install the software, preferably on your
laptop, since you will need to go back and forth from your listening chair to the computer when
setting up the EQ curves. Then, you connect the
wall wart to the R-DES box, and the R-DES box to the computer with the USB
cable. The computer will then say it has found a new device and go through
the driver install procedure. I found it worked best to direct the
installation to the folder that contains the R-DES driver rather than have
the PC look for it "automatically".
Once that is done, you will have two icons on your
desktop, one for the R-DES program and one for "Graph Paper". You might want
to put a shortcut to the "index.html" file that is located in the
Documentation directory on your desktop as well. This links to the
instruction manual.
Click Here to Go to Part II.