Introduction
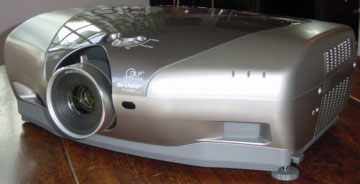
The Sharp 12000 is a full-featured, high-performance video projector
intended for use in a high-end Home Theater (HT). The 12000 is based on the
Texas Instrument's 720p 16x9 (1280x720) HD2+ Digital Light Processing (DLP)
or Digital Micromirror Device (DMD).
The plus in the HD2+ is indicative of
two things: the “dimple fix” (a tiny dark spot in the center of each pixel), and the addition of a
seventh dark green segment
to the color wheel, that together give the 12000, and other single chip DLP HD2+based
designs, an edge over projectors made just a year or so ago, including the 9000
and 10000 models from Sharp, that were based on the HD2 Mustang chip.
The
12000 offers quite remarkable performance, in terms of contrast ratio, and
features a user menu system that allows adjustment of not only those
controls necessary to get reasonable grayscale tracking, but also controls
for setting up the primary (red, green, and blue) and secondary (cyan, yellow,
and magenta) colors as well. For someone who likes to tweak projectors, the
user menu system of the 12000 is a dream come true. Although it is an
expensive projector, as you will see, we feel it is worth the price.
The HD2+
The dimple fix associated with the HD2 involves filling of the
indentation in the middle of each micro-mirror upon which the mirrors rotate
when flipping between the on to off states. If one looks carefully at the
projected pixels with HD2-based projectors, the center of each pixel is
slightly darker as light reflected from the dimple in the center of each
mirror was scattered rather than reflected onto the screen. Filling the
dimple therefore not only gives a slightly smoother image, but it also
potentially increases the light efficiency and/or contrast ratio of the
device. As a consequence, HD2+ projectors are typically specified as
having contrast ratios somewhat higher than their HD2 predecessors.
The use of a seven-segment color wheel with the HD2+ projectors also
contributes to significant improvements in picture quality by allowing
projected light intensity levels just above black to be reproduced with
significantly reduced visible dithering artifacts. From my previous
experiences with HD2 DLP projectors at various shows, and in my own
home, I have found that these dithering artifacts were, in fact a more
serious problem for me, than the perhaps more often discussed “rainbows”
that can be seen by some, with these same single-DLP chip projectors.
 Features
The Sharp 12000 has a 1:1.35 zoom lens with a fairly long throw ratio, so
the projector will most likely be mounted behind the seating, perhaps on the
ceiling, or on a high shelf. The use of a high shelf is conveniently
supported by a manual lens shift option that, in my case, allowed me to mount
the projector right side up on a shelf, with the lens at the level of the
top of the screen. The lens shift also allows placement at the bottom of the
screen for use when the projector is placed on a table or shelf at lower
heights.
The 12000 allows up to 20° of vertical
keystone correction, but I didn't use it, as the lens shift is the
preferable way of correcting for the non-centered positioning of the
projector relative to the vertical axis of the screen.
Sharp specifies the light output of the 12000 at 900 lumens and a contrast
ratio of a remarkable 5500:1! Perhaps the next thing that must be mentioned
is that the 12000 has several modes of operation that significantly affect
the projector's performance in these critical areas. First, the lamp can be
operated in an “Economy” mode. In the non-economy mode, the
fan is quite noisy, but with the Economy mode on, the light output drops
by 25%, and the fan quiets down considerably. I did all my viewing of the
12000 with the Economy mode on, largely because of the lower fan noise.
The next feature related to the above specifications, is the use of a
mechanical iris controlled by the Iris button on the remote. The iris
takes advantage of the fact that light coming off the DLP chip has a
directional characteristic such that an iris shaped like a “cat-eye” can be
used to select either all the available light, if fully open, or if stopped
down, to select light in a preferential orientation that minimizes stray
reflected light from within the DMD device, thus maximizing the contrast
ratio. Stopping down the iris, however, naturally also reduces the total
light output of the projector, as one might expect, and as will be seen in
the measurements section of this review.
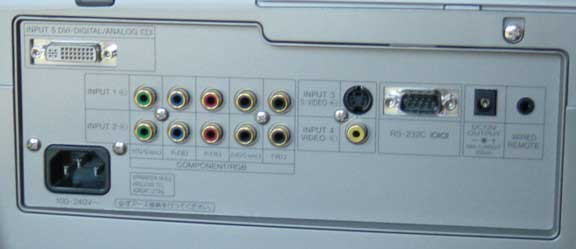
Inputs and Connectivity
The Sharp 12000 has a complete set of inputs on the back of the projector.
As can be seen above, there are composite and S-Video jacks, and two sets
of RCA jacks for component or RGB inputs.
There is also a DVI jack that that is HDCP compliant. You can also
control the 12000 via an RS-232 port. There is no VGA connector, but I
certainly didn't miss it.
I used the S-Video for standard definition TV, a DVD player connected
to one set of component inputs, my DISH 6000 HD tuner to the other set of
component inputs, and a Bravo D1 DVD player to the DVI input. I also hooked
up the composite input from the D1 so that I could access its menu when I
first turned it on, and selected the 720p output format. Lots of inputs are
very convenient.
 The
12000 is supplied with a back cover to hide the input cables if the 12000 is
mounted in a location where the back of the projector can be seen.
The
12000 is supplied with a back cover to hide the input cables if the 12000 is
mounted in a location where the back of the projector can be seen.
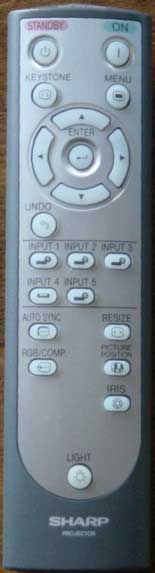
Remote Control
The lighted remote control has discrete controls for all inputs as well
the normal menu based operations, On, Standby, etc.
The Picture Position button does not move the position of the picture, as
might be expected from the name, but rather selects the picture modes or
memories, e.g., Standard, Natural, Dynamic, two Custom settings as
well as Input settings where the various parameters are saved separately
and automatically recalled, for each of the five inputs on the 12000. In
this preferred mode of operation, once you have an input properly set up, the
next time you select that input, the input specific memory takes care of the
rest.
The Resize button allows selection of the various aspect ratios including
Side Bar, Smart Stretch, Cinema Zoom, Stretch, Normal, and Dot by
Dot. The latter mode allows exact pixel mapping with 720p images instead of
a 3% overscan.
One of the handiest buttons on the remote, is the Iris that cycles the
mechanical iris between the High Brightness, Medium, and High Contrast
modes. So, when you include the fact you can operate the bulb in full
brightness and Economy modes, and adjust the iris to three settings, there
are a total of six brightness levels.
I found the remote very easy to use, even in the dark, with logical
placement of the various buttons. I was also able to program my universal
remote, an MX-800 to handle all of the relevant Sharp commands.
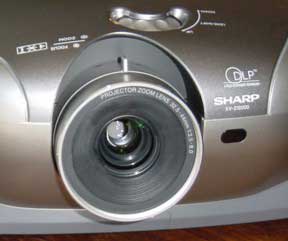
Focus and zoom are adjustable via rotating rings accessible via a recess in
the top of the projector with a convenient fin on the zoom ring. Behind
the lens is the manual lens shift control that seems conveniently placed and
worked smoothly.
On the top of the back of the projector is a small door or flap that when
lifted reveals another set of buttons that duplicate most all the control
functions on the remote.
User Menu System
As mentioned earlier, the user menu system on the 12000 is a projector
tweaker's dream, with just about everything you need to get
accurate color and grayscale tracking, and then some.
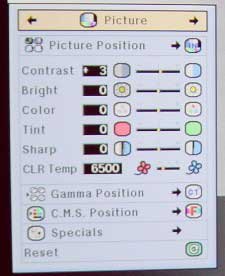
| The basic controls are found in the Picture menu where one can
adjust the typical controls for Contrast, Brightness, Color,
Tint and Sharpness. The picture menu also allows selection of the
CLR Temp or Color Temperature in Kelvin, a choice of Gamma Position,
including user defined gammas, and a choice of C.M.S. Position (Color
Management System) for adjustment of the primary and secondary colors.
|
 |
 |
The gamma positions that can be selected include:
Standard, Black
Detail,“Dynamic Gamma, Custom 1-2 and SVM Gamma that allows the
gamma to be adjusted using a computer and SharpVision Manager Software
(not tested). |
| The available CMS settings include Standard, Film Tone and two
Custom modes. |
 |
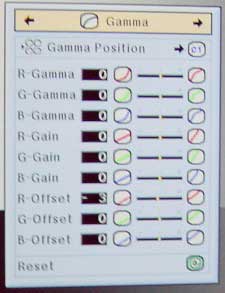
The Gamma menu page contains the parameters needed to tweak the
grayscale tracking and gamma for this, or any projector, with a Gamma,
Gain, and Offset or bias setting for each of the three primary colors.
It is refreshing to find all these controls in the user menu rather than
having to access a special service or factory mode.
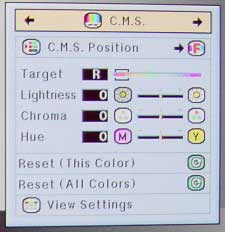
It is the C.M.S. that really sets the Sharp 12000 apart, in terms of
adjustability. With the C.M.S. menu the user is allowed to adjust the
Lightness, Chroma and Hue for each of the primary and secondary
colors.
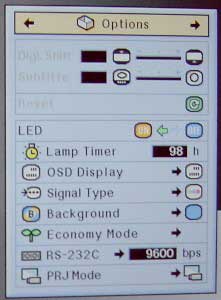 |
The Options menu allows viewing of the lamp hours, adjustment of
the Economy mode, and other miscellaneous functions as can be seen in
the picture on the right. |
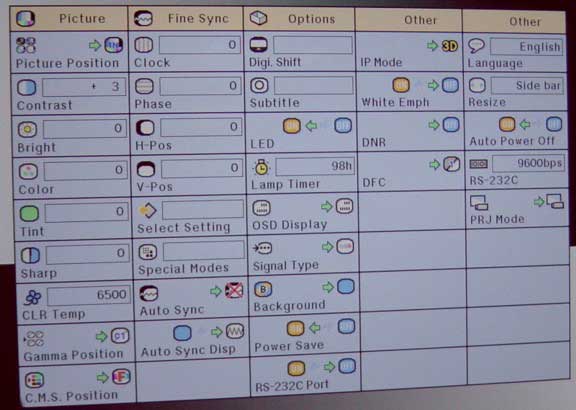
There is also a very handy Status view that can be selected by the menu
system that shows the key settings in all menus.
Click Here to Go to
Part II - Measurements and Viewing