THE ENVIRONMENT IS JUST AS IMPORTANT AS THE
EQUIPMENT!!
Print that out and pin it above your bed. The simple truth of
it is all too often forgotten. The best projector and screen
in the world can't look good in a room where light is out of control.
A speaker which measures flat in an anechoic chamber will sound terrible when surrounded by nothing but bare walls.
The bottom line is that we pay too much attention to the equipment, and
not enough attention on the room.
But
how tight can we go?
I've never made any bones about my financial situation: I don't
make a whole lot of green. Just enough to have a modest mortgage
and still squirrel away a little for a rainy day. We buy generic
ketchup, heat the house to no more than 650 F in winter, and drive an Echo.
So, this is a story of me making the only theater I could afford.
The largest contiguous space available to us
in our basement was roughly 10' x 11'. The task then was
intellectually monumental: Make a pill box look and sound top grade.
The size of the room very quickly dictated some parameters: We
could accommodate no more than two people, fortuitous, as there is only my
wife and I (so far). In keeping our heads out from the back wall even
just a little, the distance from our eyes to screen and speakers would
be just 7 feet, which meant a 30"- 34" 16:9 direct view TV or 40" flat panel screen, and speakers that
lend themselves to near field use.
Construction
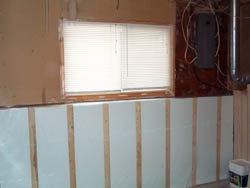
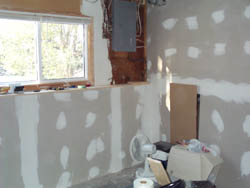
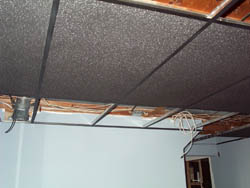
The largest undertaking was to undo the slapstick
superficial work performed by the house's previous owners.
We removed a little of the
right wall, increasing the entrance opening in the hopes of letting a
chunk of audio energy, particularly bass energy, escape out that way. I will share a few photos of the progress, such as insulating
the concrete
with the TruWall system, dry wallin', and drop-ceiling
install.
At the same time as this room (HT) was under construction, we had our ancient fuse box
replaced with a 200amp breaker box and ran two dedicated lines to the
HT room: One was at the front for the equipment, another at the back for
future use (such as a second sub) or what have you. The lights were
piggybacked onto the existing light circuit for the basement.
 For the Love of Video
Inspired by Stacey Spears' effort to make his particular room
100% black, we started in that direction. We got a shade of paint called
'Merlot' which was so dark that after two coats you could not see into
the corners, even with broad daylight streaming in! It made us
uncomfortable, and I was concerned that such darkness during the day
would eventually encourage mildew or mustiness should the basement ever
get damp (ever hear the phrase "light kills germs"?) The compromise was
to lighten the walls but keep our plan for a black ceiling. The color we chose is just one step off of absolute gray into blue.
I can feel Joe Kane cringing right about now, but as I'll show, much of
the wall behind the TV got covered in dark grey acoustic foam anyway, so on
the whole, the slight blue doesn't mess with my vision to any extent I'd
be concerned about.
For illumination, we put in a total of six track lights, three across the
front aimed behind the TV and speakers, and three above the couch. All
are on a Lutron dimmer, chosen for its reputation for low noise.
We could not find any PAR20 style bulbs that were spec'ed at D6500 so we
went with a "Full Spectrum" filtered bulb. It wasn't 100% correct but
definitely more neutral than a yellow incandescent or a blue halogen.
Again I can feel Joe Kane grinding his teeth.
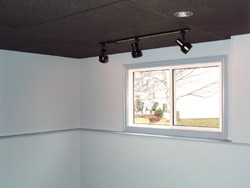
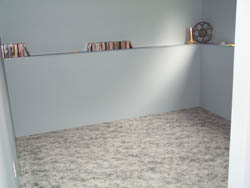
The black ceiling is probably our favorite part of this room.
In addition to just looking cool, it significantly lowers light
scatter and makes what little light we do use very easy to control.
With the blinds down and lights dimmed to just above the Lutron's minimum, we get
just enough light behind the screen to reduce eyestrain, enough at the
couch to see our popcorn bowl, but not so that any hits the TV screen.
No reflections, no hot spots, nothing. In the above photo the
lights are up to full power! Note how no light reaches the front of the
speakers, the equipment, and most importantly the face of the TV.
|
 |
|
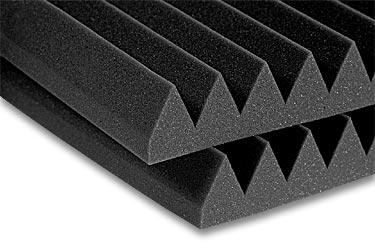
The Auralex 3" Studio Wedge |
For the Love of Audio
Now we get to the fun part: making the room not sound like the
small square box that it is. With construction finished and the
paint dry, I began to lose faith. There was a horrible
sound in there. I temporarily set up a couple speakers and hung
my head. It sounded like I was inside a tin can.
What was happening is that the speakers were being overpowered by reflections of
their sound bouncing off the
walls. Our primary focus therefore was to absorb some of that
extraneous sound. This did not mean wall to wall coverings, turning the room into an
anechoic chamber though.
While there is a wealth of Do-it-yourself ideas out there (such as
the now famous Owens Corning 700 series insulation), for this project we
wanted to try something commercially available. These can be extraordinarily expensive though. While treating a
room with Auralex products still requires a financial commitment, they seemed
more reasonable while still offering known performance
specs, a professional look, and peace of mind (you don't get fire safety
rating on generic egg crate foam).
We chose Auralex
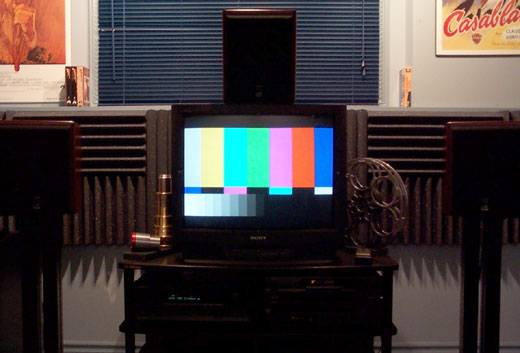
3" StudioFoam wedges for this task, installing a 2'x3' peice behind
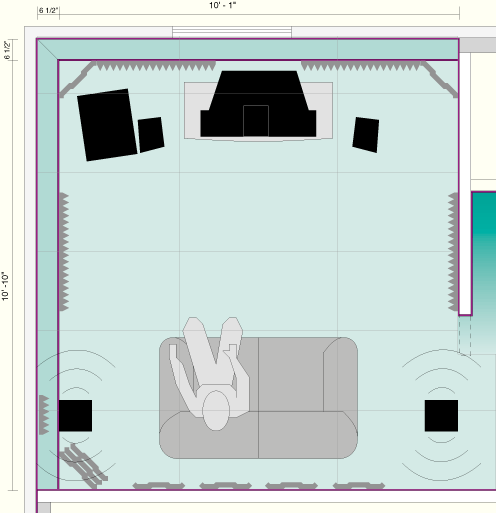
each front speaker and on each side walls
coincident with the primary reflection point from the front speakers
(see floor plan, above). I've seen many
people make the blanket statement that you want absorptive material on
the entire front wall, but in my opinion, it is possible to overdo it,
especially considering my HT room's need for dipole surrounds, which we'll
talk about later. Such
speakers actually need reflective surfaces to function properly, so our foam
was not to be installed above 4 feet off the floor.
The 3"
wedges in the positions shows in the floor plan above made the room
remarkably dry and tight sonically.
For those interested in a more
"discreet" look, one can simply make a frame from 1"x4" wood to go around
the perimeter of a sheet of wedges, and cover that with an acoustically
transparent piece of cloth such as the now renowned Gilford's of Maine
material. Another option is to find solid foam sheets which
look tidier and may even be more effective. Acoustic guru Floyd Toole
suggests avoiding any sort of "cut" foam because, in his research, a 3"
thick wedge cut has less absorption than a 3" thick solid piece.
Nothing wrong with wedges (except that they may gather more dust over
time), but his point is that wedges are more about "the
studio look" than actual performance.
Foam products like the Auralex wedges are rated and/or measured down to about 125 Hz.
Their effectiveness below that drops off dramatically, and that's being
polite. So our attention
now turned to bass and the subwoofer.
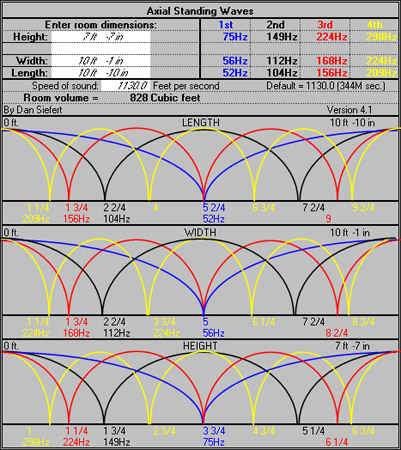 The
data sheet put together by Harman International (available for
free from their website) told us quite a bit about what to expect in
terms of bass insofar as standing waves are concerned. As far as major axial modes, all but the first
would be well above the crossover range and of little concern. With the main left and
right speakers placed at the null of the first odd-order mode in the
room's width (coincidentally a good place for them anyway), we could
effectively null out all but the first axial mode through the width. This means
even bass response when seated left or right within the speakers' range,
assuming identical bass in
the Left and Right channels.
The
data sheet put together by Harman International (available for
free from their website) told us quite a bit about what to expect in
terms of bass insofar as standing waves are concerned. As far as major axial modes, all but the first
would be well above the crossover range and of little concern. With the main left and
right speakers placed at the null of the first odd-order mode in the
room's width (coincidentally a good place for them anyway), we could
effectively null out all but the first axial mode through the width. This means
even bass response when seated left or right within the speakers' range,
assuming identical bass in
the Left and Right channels.
Within the subwoofer range, there would be one nasty mode in the width
and another very close to it in the length (52 Hz and 56 Hz). Keep
in mind though that we have no wall to our immediate right (see floor
plan above), and to the right of the right speaker is a thin,
flexible access panel leading to a crawl space under the stairs, so we're not really getting the full double whammy here, the
single 52 Hz node in the length being our major concern.
When tried right in either corner, a sub would throb with excessive energy in that range. It might have been interesting to place one right between the front speakers, but
unfortunately that just was not possible. A pair of subwoofers would also have worked wonders, placed
exactly where the front left and right speakers go. We
contemplated using a pair of subwoofers as "speaker stands",
but my budget precludes us from acquiring a second unit at this time.
Being seated so close to the back wall, we knew we needed something
there but were uncertain as to absorption vs. diffusion so we contacted Auralex for some advice. Gavin Haverstick,
Acoustical Engineer at Auralex, was adamant that diffusion was
inappropriate because we were just to close to the back wall. "I
have an idea for your back wall", he said, "and at the same time we'll
take care of the bass".
|
 |
|
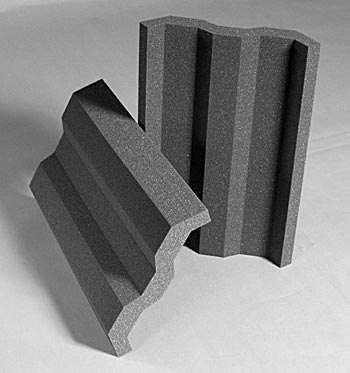
The Auralex Versatile |
One of their newer foam products is the VersaTile. As the name
suggests, it is a tile of acoustical foam which has more than one use.
They are shaped to either go flat on a wall for broadband absorption or in
a corner with a void of air behind them. The VersaTile is much less expensive than Auralex's other corner
products and Gavin feels only a
little less effective as a corner absorber.
On the back wall we placed a row of VersaTiles flat. While at CEDIA this past September,
I attended Floyd Toole's workshop on acoustics. It was gratifying
to hear him show how when you are seated against the back wall, or close
to it, you really want absorption directly behind you. Nice to
know we barked up the right tree.
The rest of the VersaTiles went into the three corners, the back
corner getting a triple layer of them since it is the acoustical
symmetry of the opening at rear right. We fussed and fussed with
subwoofer placement and finally found the position shown in the floor
plan (out from the front left corner). There is still just a bit
of a swell at 50 Hz or so but it is not dramatic and could be zeroed out
with a filter later on.
An ongoing problem we have is noise from the drop ceiling.
Every so often one will buzz with a deep note, not from the sub but from
the surrounds (even though they are high passed).
Tapping the offending tile makes it stop buzzing but a few days later another will start
up. One solution I've read about is to cut pieces of dry wall
slightly smaller than the ceiling tiles and place them on top of each
one to weigh things down. I've yet to work up the gumption to undo all
my other efforts and try it.
 Our Reference Equipment
While this room is designed to allow apt evaluation of any equipment,
a few words on our choice of reference gear, at least those pieces which
relate directly to the room, is in order.
At the present time, our screen consists of a trusty Sony 27"
Trinitron. This one is a real gem because it does not include any
of the useless "features" that are now so prevalent, such as SVM,
"auto" color, or other such nonsense.
D6500 calibrated and meticulously tweaked, many friends and family have
asked if it is HD. Of course it is interlaced and
decidedly not 16:9, but the only direct view monitor I'd be truly satisfied with
is the now discontinued Princeton AF3.0. My search for a screen goes on.
The M&K
MX-105 sealed subwoofer turned out to be a perfect fit for this room.
We hooked it up, and everything snapped into shape! With
the VersaTiles three-deep in the back corner opposite the opening, we
have very tight bass, without ridiculous humps. Our couch is so
narrow that there is virtually no difference in bass when seated left or
right. The left seat sounds just a
little fatter and the right a little leaner. In practice
though, the variance is small enough that I let my wife decide where to
sit. Left or right seating does not affect my movie watching enough to be
preoccupied with it.
 For surrounds, the choice was extremely critical. Shoved up
onto the ceiling, as far apart as possible, they are only six feet from
the center seat. I don't mind seeing direct radiating speakers used as
surrounds, but to "get it right" they have to be relatively far away
from you. If not, as would be the case in this room, sitting even slightly off center
would get you a collapsed surround sound field. We chose
a pair of early Paradigm ADP-170 V2 speakers as our reference. These are a
"classic" dipole in that the front and back drivers are really at
1800 to one another (as opposed to designs which put them at as
little as 900).
For surrounds, the choice was extremely critical. Shoved up
onto the ceiling, as far apart as possible, they are only six feet from
the center seat. I don't mind seeing direct radiating speakers used as
surrounds, but to "get it right" they have to be relatively far away
from you. If not, as would be the case in this room, sitting even slightly off center
would get you a collapsed surround sound field. We chose
a pair of early Paradigm ADP-170 V2 speakers as our reference. These are a
"classic" dipole in that the front and back drivers are really at
1800 to one another (as opposed to designs which put them at as
little as 900).
Paradigm knows a thing or two about dipole design.
Although not THX per sé, these are made with the same mandate of flat power response, that is,
a flat response as a sum of its sound, as opposed to on axis. As such,
we get a full spectrum sound on either side, discrete enough to impart
direction and "image" with the corresponding front speaker, all the while
working well for both people on the couch.
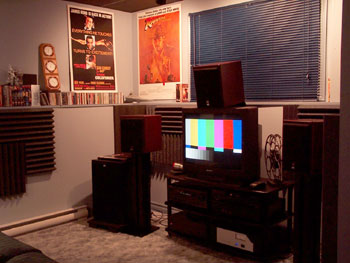
 For fronts, we've settled on a trio of M&K MPS2510 THX
PM3 speakers. These pro models have controlled vertical
directivity, but it is not quite as tight as the standard S150THX. This
is important because, again, as we are so close to the speakers (as is the case in most mixing rooms), slouching
in my seat can change my vertical angle from the speaker by 10+ degrees.
For fronts, we've settled on a trio of M&K MPS2510 THX
PM3 speakers. These pro models have controlled vertical
directivity, but it is not quite as tight as the standard S150THX. This
is important because, again, as we are so close to the speakers (as is the case in most mixing rooms), slouching
in my seat can change my vertical angle from the speaker by 10+ degrees.
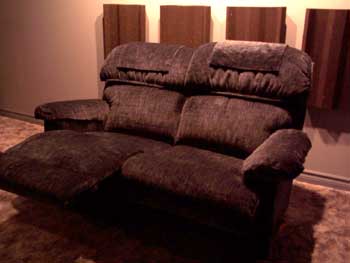
The seats are actually a pretty important choice. You'll be
spending at least two hours at a time in them so you want something that
will be comfortable in the long term, not just the 1-2 minutes you spend
in them at the store. I recommend shopping for furniture like this
in a gallery that will let you bring a book and spend quite a bit of
time sitting in a piece before buying. Have you ever felt
comfortable at the start of a movie but by the half way point are
twisting and turning to get rid of that pain in your back? We chose a La-Z-Boy "Motion Loveseat", basically two recliners stuck
together. We considered two recliners but felt that the adjacent
arms would waste prime real-estate at center. The loveseat puts
us both immediately adjacent to center, and it's extremely comfortable.
 Decor
Decor
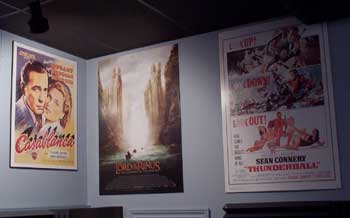
Just a few notes on decor. We've been buying movie posters from
movieposter.com
and have found the prices very reasonable and the selection second to
none, but mounting posters so that they
will stay nice for years can cost a fortune. We've found that black foamcore, at $10
a sheet, works perfectly. We use a spray adhesive,
carefully lay the poster on the foamcore, trim the foamcore, and seal the
poster with a matt
art fixative. We get all this at a decent art supply store because
they stock "acid free" foam core and archival quality
adhesives and
coatings. These are things you will want if your posters are to
stay around for while.
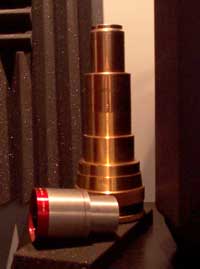
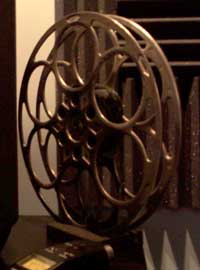
Some of the curiosities in the room come from bugging the local cinema.
A 20min 35mm film real and various non-functional projector lenses pepper the room.
Cost: Free.
Summary
At the end here, I hope I have inspired some of you with limited
space and/or limited finances. Don't be afraid of "going small".
A properly set up TV and audio system in an accommodating room can deliver a high
quality and immersive movie watching experience, easily besting state of
the art equipment placed in a poor AV environment.
- Brian Florian -