


Introduction
The Sherwood RD-7503 A/V Receiver is one of the newest offerings from Sherwood aimed at controlling all the latest devices in your home theater. The RD-7503 A/V receiver provides 7 channels of amplification at 100 watts per channel, 3 HDMI 1.3 inputs with repeater, on-board decoding of DTS-HD Master Audio and Dolby TrueHD high resolution audio formats, automatic room setup and support for a second zone. The RD-7503 also provides optional support for their DS-10 iPod dock, SIRIUS Satellite, and Bluetooth support which I will discuss later in the review. Sherwood has packed a tremendous amount of technology into an entry level receiver. Since this product is most likely targeted at someone getting started in home theater, or upgrading from older technology, I was very curious to see how easy the RD-7503 was to setup and use.
Specifications
- RD-7503 Receiver
- Codecs: Dolby Digital, Dolby Digital EX, Dolby Pro Logic IIx, Dolby Digital Plus, Dolby TrueHD, DTS (ES Discrete/Matrix, Neo:6, 96/24), DTS-HD Master Audio / High Resolution Audio
- Power Output: 100 Watts RMS x 7 into 8 Ohms
- THD+N: 0.2%
- DACs and A/D: 24/192
- 2-Zone Operation
- SIRIUS Satellite Radio Capable
- Automatic Speaker Setup with Microphone
- Dimensions: 5.5″ H x 17.375″ W x 14.75″ D
- Weight: 25.4 Pounds
- MSRP: $439.95 USA
- BT-R7 Bluetooth Adapter
- Maximum Range: 33 ft (10 m)
- Frequency Response: 100 Hz ~ 15 kHz ± 3 dB
- Bluetooth Support: Version 1.2 and A2DP (Advanced Audio Distribution Profile)
- MSRP: $59.95 USA
- Sherwood
Design
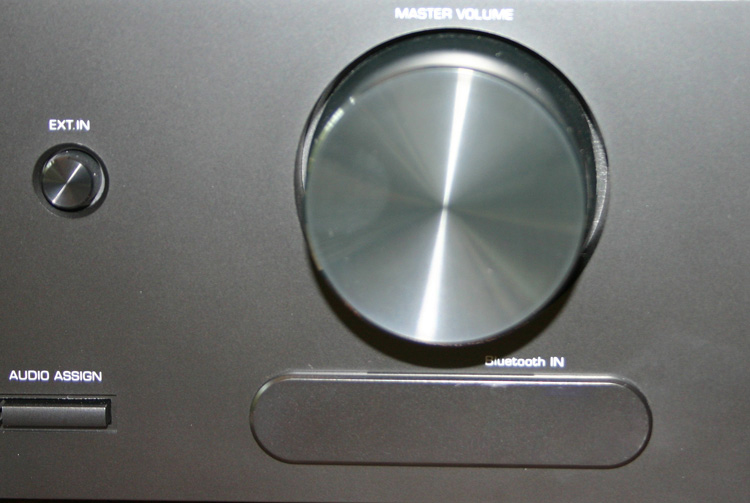
The RD-7503 comes in black and has a very straightforward front panel design. Insert Fig 1. There are knobs for input selection and volume control, as well as a multi-control knob for selecting options during setup or for changing surround modes. The other controls are buttons which provide access to such things as power, setup, room 2, and the tuner of the receiver. The RD-7503 also has two buttons for access to surround modes and stereo. This allows the user to directly select stereo decoding or surround sound decoding without having to scroll through the full list of processing modes.
Just under the master volume control is a small plastic cover.
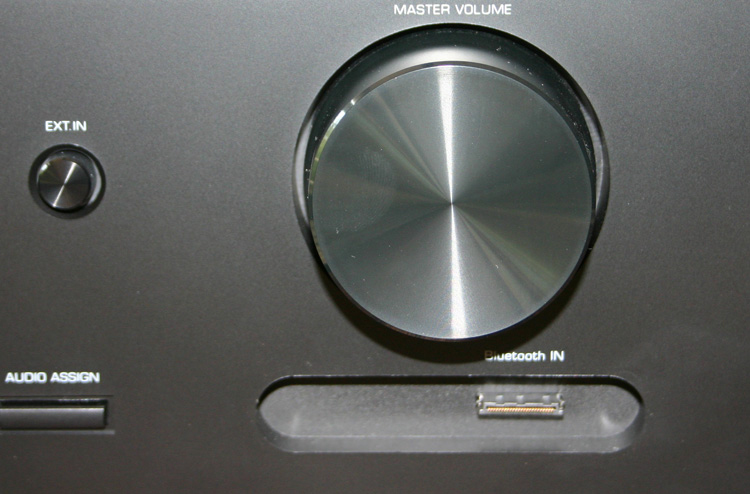
The cover is easily removed and reveals the 24 pin connector for the BT-R7 Bluetooth Adapter.
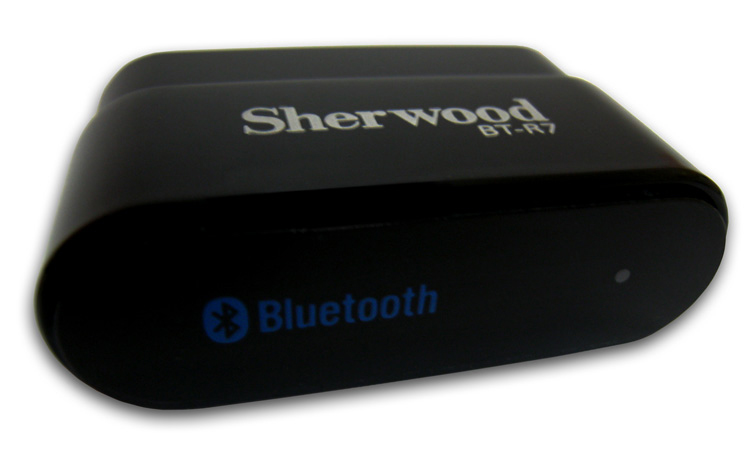
The BT-R7 itself is very small (1.75″ W x 0.5″ H x 1″ D) and features a blue LED which is used to indicate successful connectivity.
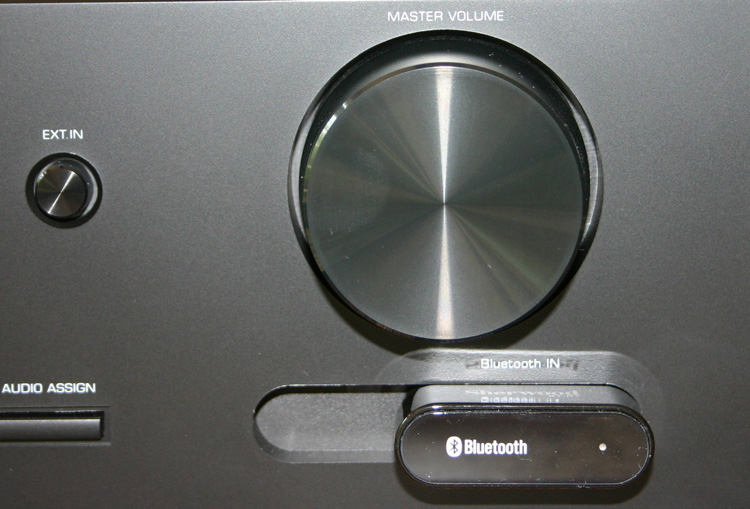
The installation of the BT-R7 adapter is completed by simply plugging the adapter into the 24 pin connector. The BT-R7 requires no batteries since it gets its power from the RD-7503. Cosmetically the BT-R7 blends nicely with the design of the RD-7503, although there is extra space to the left of the adapter which is unused.
The back panel of the RD-7503 is well organized and offers support for a wide array of components.
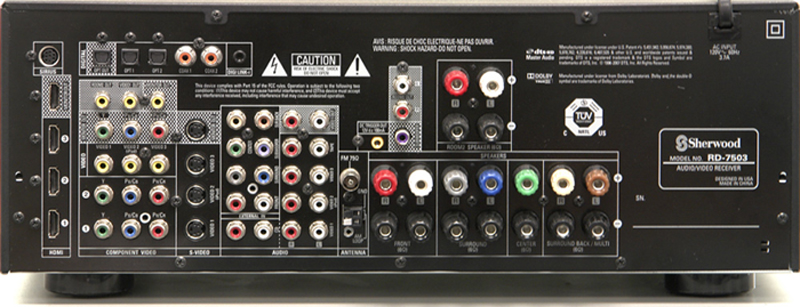
The receiver supports three HDMI 1.3 inputs and one HDMI 1.3 output. This is enough to handle a satellite or cable receiver / DVR, a Blu-ray player and a gaming system. The receiver supports a full complement of analog audio and video inputs with two component video inputs, three S-Video and Composite inputs, with one output each, as well as audio inputs for CD and Tape. The RD-7503 also supports 4 digital audio inputs (2 coaxial and 2 optical). Sherwood also included external analog inputs to support up to 7.1 channels of analog input. This feature allows you to take advantage of the audio decoding of an external player such as a Blu-ray player or a DVD/SACD/DVD-A player and enjoy the audio from the RD-7503.
The speaker jacks support a full complement of 7.1 speakers. If you don’t use the Surround Back speakers, you have the option to bi-amp the front speakers using the Surround Back channels. This can be useful if your front speakers support bi-amplification. I would recommend that the Surround Back speakers be used for their intended purpose if you can accommodate the extra speakers in your listening room. Jacks are also provided for a stereo pair in Room 2. If you connect both the Surround Back speakers and the Room 2 speakers to the RD-7503, the receiver will power the Room 2 speakers when the Room 2 feature is engaged, otherwise the Surround Back channel will play when Room 2 is turned off.
The remaining connections on the RD-7503 back panel allow support for a SIRIUS satellite antenna, iPod connectivity, and of course AM and FM antennas for the built in tuner. A 12 Volt DC Trigger is also included which allows you to turn on another device, such as an external amplifier for room two.
Setup
After unpacking the RD-7503 and placing the receiver in my cabinet, I couldn’t wait to get everything connected. I started with the speaker cables first since they tend to be the most time consuming. The speaker binding posts on the RD-7503 are three-way posts which allow cable to be inserted from the top, bottom, or directly into the post via banana connectors. It is tedious to hook-up bare wire to 14 binding posts in a 7.1 system so I would always recommend that you take the time to terminate your speaker cable with banana connectors. This greatly simplifies the process should you have the need to move or change the equipment in the future. One note about the RD-7503 speaker connectors is that they don’t accept spade connectors. I would also like to see the designers put the labels for the individual speaker terminals above or to the sides of the terminals themselves. In the current design, you have to look under the connectors to figure out if it’s the Surround or Surround Back speakers that you are working with. While a minor detail, this sort of simple change really helps when you are configuring a unit with bare wire and the receiver is only a few feet off the floor in your cabinet.
Moving on to the HDMI connections was a breeze. The RD-7503 has 3 HDMI inputs which I immediately filled with my satellite DVR, PS3, and DVD player. I wished that there was an extra HDMI input for expansion, but the three connections were more than enough for now. I ran a single HDMI output cable from the RD-7503 to my HDTV. I moved on to the component video connections. I connected my media server to the RD-7503 via component video but I also had to run a component video cable from the RD-7503 to my HDTV. The reason for this is that the RD-7503 does not perform any video processing on the incoming video signals. This means that while the RD-7503 is capable of switching the video output based on the receiver input that is selected, it is only capable of sending the video in the same format as the source. From a cabling perspective, if you use HDMI, component video, S-Video, and composite video source devices with the RD-7503, you must run one cable of the same type to your HDTV in order to enjoy the video. In my case, I ended up running an HDMI and component video cable to my HDTV.
The next thing I was looking for were the on-screen display (OSD) menus for the RD-7503. The owner’s manual makes a small reference to the fact that the OSD menu is only available via composite video via the Video Monitor Out connection. I hooked up a composite video cable to my HDTV, changed the input on the display, and after hitting Setup on the receiver was finally looking at the OSD menu of the RD-7503. The next thing I wanted to accomplish was to use the automatic room setup feature of the receiver. Using the supplied microphone and the OSD menus, I sat back and listened as the RD-7503 sent out test tones to identify the speakers, their distance from the primary listening position, and their overall response characteristics. Once the process was done, I was pleasantly surprised to find that the RD-7503 had correctly identified all the speakers in my listening room, and had correctly identified the distances and adjusted the levels for each speaker to achieve a uniform balance in my listening room. The next thing to do was to start enjoying.
In Use
After completing the setup, my first reaction to using the RD-7503 was how simple it was to use. The receiver did an excellent job switching between my three HDMI sources. Simply changing the input on the RD-7503 and playing the source device resulted in a seamless video display to my HDTV. The receiver had no problems passing 1080p video to my HDTV, and I never experienced any handshake problems between my devices.
Playing video from my media server was not so straightforward. One limitation of the RD-7503 is that you cannot arbitrarily assign a video source to any input. In my case, I would have preferred to assign the Component Video 1 input to an unused input such as Tape. Unfortunately, this can’t be done so you end up sharing sources on the Video inputs. For example, Video 1 was handling the HDMI input from my DVD player and also the component video input from my media server. I also assigned the media server’s audio from Digital Coax 1 to Video 1 as well. If I wanted to listen to my media server, I had to switch to Video 1 on the RD-7503 and make sure that the DVD player was turned off. This sort of configuration can be hard to troubleshoot, and is not particularly family friendly if you have to remember what device to turn on/off and when.
As for listening tests, I was very pleased with the RD-7503’s ability to handle movie soundtracks. I played two of my standard listening tests – Gladiator and Master and Commander. Both of these movies offer some incredible sound effects and are a good test of any system. For Gladiator, the RD-7503 did an excellent job reproducing the combat scenes and the noise of the crowds and chariots in the coliseum. The sound of the mace being circled overhead in the “Battle in Chains” scene showcased the value of a 7.1 speaker system as the RD-7503 seamlessly moved the sound around the listener. In Master and Commander, the RD-7503 did an excellent job creating the sounds of the ship and the footsteps of the crew running along the decks of the ship. Overall I was very pleased with the ability of the RD-7503 to handle movie soundtracks and to just allow the listener to sit back and enjoy the show. I should mention that using the automatic speaker setup was crucial to obtaining this result with the RD-7503. I was not happy with the overall presentation of the movies until I completed the automatic setup process.
As for music, I frequently use the soundtrack from City of Angels as a good sampler to evaluate a system.

This soundtrack contains tracks from artists like U2, Sarah McLachlan, Peter Gabriel, Eric Clapton, Alanis Morissette, and Gabriel Yared and provides an excellent sampler of voices and styles. One of the characteristics of this disc is that the music offers a wide dynamic range which gives you an opportunity to see how well a receiver behaves. Examples of this are track 6, Sarah McLachlan’s “Angel” and track 8, Peter Gabriel’s “I Grieve”. Both of these tracks allow you to experience the full vocal range of the artists. What I look for in listening to these tracks is how well the receiver gets out of the way of the music. I want to hear the nuances of their voices, enjoy the quiet transitions, and feel the passion in their voices. While the RD-7503 reproduced the music, the overall effect was simply uninspired. The mid-range was dull and lifeless and many of the subtleties in the vocals were absent. To be fair though, while the RD-7503 didn’t impress me for critical listening; it will be just fine for someone wanting to just kick back and enjoy their favorite tunes.
The remote for the RD-7503 is a no frills, basic remote that gets the job done.
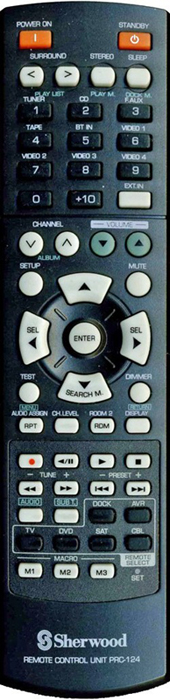
The remote is not backlit and my biggest complaint is that the volume and channel buttons are right next to each other and are the exact same shape. The remote can provide basic control of other devices in your system. The only thing to remember is that any OSD messages generated from using the remote are only visible from the front panel of the RD-7503 or from the composite video output of the receiver. For example, you can only see a change in volume or surround mode by looking at the front panel or by leaving your HDTV on the composite video input. The latter being most unlikely for daily use since you will be using an HDMI connection to take full advantage of the RD-7503’s capabilities.The BT-R7 Bluetooth Adapter is an add-on module that you can purchase for the RD-7503.
The inclusion of Bluetooth technology in the home theater environment just takes us one step closer to having all our devices talk to each other. To use the module, you need to pair the adapter with one or more Bluetooth enabled devices in your home. For my testing purposes, I used my Blackberry Curve 8900. After turning on the RD-7503, the blue LED on the BT-R7 adapter starts blinking indicating that it is not paired with a device. I initiating the pairing process on my phone and the BT-R7 module immediately appeared. I had to enter a password of “0000” to complete the process. The blue LED on the BT-R7 stayed on indicating a successful pairing. Changing the input on the receiver to “Bluetooth In” allowed the phone to transmit stereo audio to the receiver. I was surprised at just how enjoyable this feature really was. It was delightful to be able to play music from the phone seamlessly throughout the listening room. This feature allows you to just enjoy the music and removes the hassle of having to find the media for that great song you were just enjoying. We will hopefully be seeing the integration of Bluetooth technology in more and more products in the future.
Conclusions
If I have any reservations with the RD-7503 it comes down to documentation. The typical user of this receiver will either be someone new to home theater or someone upgrading from an older product. Given that audience, I would like to see the manufacturers provide enough of an over view so that the consumer can get the system properly installed and operational, and then over time tackle the advanced features and tweaks that the system may offer. While the auto room configuration is one of the greatest strengths of the RD-7503 it should not be buried on page 51 of the owner’s manual. The manual should clearly list the Auto Setup function as a step in the setup process. It is briefly mentioned in the section that describes the front panel input jacks, but there is no emphasis placed on how important this feature is to the setup and overall enjoyment of the RD-7503.
I would love to see Sherwood create a dedicated section that helps the consumer configure the RD-7503 once the initial device connections have been made. It should clearly cover the auto speaker setup and it should explain the requirement for an analog connection to view the OSD menus. In conclusion, Sherwood has done a great job incorporating a lot of technology into a modestly priced receiver. The support for HDMI 1.3 repeater functionality allows the receiver to work with any of today’s HDMI products and it allows the consumer to enjoy all of the advanced audio formats that come along on the Blu-ray platform. The RD-7503 has more than enough inputs to handle a typical home theater and its ability to auto configure the speaker configuration for your listening room is a major selling point. The RD-7503 was very enjoyable for movies and will be more than sufficient for music for the typical user. The availability of the BT-R7 Bluetooth Adapter is also a distinct advantage that will allow you to make the most of your portable music player. If you are looking for a modestly priced receiver which can handle today’s technology, then by all means give the Sherwood RD-7503 a listen.