
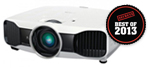

Introduction to the Mitsubishi HC8000D-BL 3D DLP Projector
Whenever I attend the CEDIA Expo, I visit all the projector manufacturers, both large and small. While Mitsubishi is a large company, their projectors are not as well-known as other brands. At the 2012 Expo, I had a chance to check out their all-new DLP models.
Mitsubishi currently offers four projectors in the Home Entertainment line, ranging from 1300 to 1500 lumens and 4000 to 330,000 to 1 claimed contrast. Naturally, I requested their flagship model, the HC8000D-BL. In addition to 3D, it offers frame interpolation, a 24p frame rate of 120Hz, 2D-3D conversion, a slick multi-iris system, and a compact lightweight chassis that makes installation easier. The imaging chip is Texas Instruments’ DarkChip 3 and makes for some impressive contrast performance. You can read more about that in the In Use and On the Bench sections.
With even the best-performing projectors dropping in price to affordable levels, Mitsubishi has its work cut out for it in the sub-$3k segment. The competition comes in the form of LCD models; Epson and Panasonic most notably. And there are other DLPs from Optoma and BenQ that cover both sides of the $3000 price point. Let’s unpack the box and see how Mitsubishi stacks up!
MITSUBISHI HC8000D-BL 3D DLP PROJECTOR SPECIFICATIONS
- Design: Single-Chip DLP 3D Projector
- Panel Type: 0.65-inch Texas Instruments DMD (DLP) DarkChip 3
- Color Wheel: 6-Segment, 4X and 6X Speed
- Native Aspect Ratio: 16:9
- Native Resolution: 1920×1080
- Anamorphic Lens Support: Yes
- 3D formats: Frame-packing, Side-by-Side, Top-Bottom
- 2D-3D Conversion: Yes
- Throw Ratio: 1.4 – 2.1
- Lens Shift: 12-47% Vertical
- Light Output: 1,300 Lumens
- Contrast Ratio: 330,000:1 Dynamic
- Iris Control: 4 (3 Fixed, 1 Auto)
- Image Size: 50″ – 300″
- Inputs: 2 HDMI 1.4a, 1 Component, 1 VGA, 1 3D Emitter
- Control: 1 RS-232, 2 12v Trigger
- Lamp Power: 240 Watts
- Rated Lamp Life: 5000/3000 Hours (Low/Normal)
- Dimensions: 5.6″ H x 15.6″ W x 12.9″ D
- Weight: 12.6 Pounds
- Warranty: 3 Years with Express Replacement, 1 Year/500 Hours on Lamp
- MSRP: $2,999 USD with Spare Lamp
- 3D Glasses: Sold Separately, $199/each
- 3D Sync Emitter: Sold Separately, $99
- Mitsubishi
- SECRETS Tags: Projectors, DLP, 3D, Video
The Design of the Mitsubishi HC8000D-BL 3D DLP Projector
The HC8000D-BL utilizes a single TI 0.65-inch DarkChip 3 along with a six-segment color wheel and a 13-element, all-glass lens. The zoom ratio is 1.5 with a very low f-stop factor of 3.0 to 3.5. This means the light reduction as the lens is zoomed out is minimal. Manual vertical lens shift is available but the range is small at 35% of screen height. And the offset at minimum shift is still 12% below or above the screen edge. Focus and zoom controls are manual. Of course, keystone correction is supported but since this always reduces resolution, I don’t recommend using it.
The chassis is all-black with a just a little bling in the form of a silver ring around the lens, which is mounted off-center. The HC8000D-BL is extremely compact and light which makes installation much easier. Even a small table placed in front of your seating will do. On top are basic controls for power, menu operation and input selection. Ventilation runs down both sides from front to back and there is no light leakage evident. The fan is fairly quiet even in the bright lamp mode which I used for all testing and viewing. If you run the projector right-side-up, two adjustable feet at the front will help get things level.

Around back are two HDMI 1.4a inputs along with a single component RCA and a VGA D-sub port. There is no composite or USB input. A mini-DIN connector is there for the separate 3D emitter and there is control available from an RS-232 input and two 12-volt trigger outputs. Infrared receivers are located on the front, back and top of the projector. You can control which receivers are active in the menu system.
The remote is also small and compact with a full complement of keys for all major functions. At the top are discrete power buttons and a 3D-mode toggle. This can be used to turn off the 3D effect when watching native 3D content. Next down are input selectors and controls for Frame Rate Conversion (frame interpolation), picture mode and the color management system. In the center are the directionals for menu navigation. On the lower half are more direct-access buttons for picture adjustments and the 2D-3D conversion feature.


The glasses and emitter are sold separately at $199 and $99 respectively. The emitter connects to the projector with a cable and throws a fairly wide field. I had no trouble syncing up when watching in 3D. Speaking of the glasses, I found them somewhat large and heavy compared to others I’ve tried recently. They reminded me of the first generation of 3D glasses that we saw perhaps a year or two ago. Power-on is via slider switch; which I prefer. The non-rechargeable button battery is included and rated for 70 hours of use.
Setup of the Mitsubishi HC8000D-BL 3D DLP Projector
I decided to mount the HC8000D-BL upside-down from the ceiling, which is a pretty typical installation method. Once locked down, I selected Mirror Invert from the menu to right the picture. An Oppo BDP-93 was connected via HDMI. I also installed the 3D emitter next to the projector so its signals would bounce off the screen.
After breaking in the bulb for 50 hours, I turned to the extensive menu system. The first section, Image, contains everything you need for a detailed and precise calibration. There is a two-point white balance, multi-point gamma control, and full color management system. Out of the box, the HC8000D-BL had decent grayscale tracking and fantastic gamma so calibration was pretty easy. The CMS was unable to fix all of the color errors I encountered but the end result was quite good.
All your settings can be saved to any of the four picture modes, or the three additional memories. There are also ISF Day and Night modes which can be accessed with a passcode. These can be locked once calibrated. I chose the Cinema mode as the best starting point and saved all my work to that mode. You can do a separate calibration for 3D and save your settings to that, or any other mode. One quirk I encountered; the 3D picture mode is not automatically selected when the projector is switched to 3D operation, you have to do it manually.
In exploring the other features of the HC8000D-BL, I was particularly drawn to its multi-iris system. A variable iris is installed near the DLP chip and serves a dynamic contrast function. There are three settings that each takes the black level progressively lower. The third option definitely crushes detail. Then there are two fixed irises that reduce light and a third that can be set to one of two openings. Closing down to the High Contrast setting maintained good light output and produced excellent native contrast to the point where the variable iris was unnecessary. Thanks to this unique system, the HC8000D-BL boasts some of the best contrast I’ve seen from any DLP display.
Mitsubishi also offers a frame interpolation feature which they call Frame Rate Conversion. In practice, it’s one of the best I’ve seen. There are two modes, True Film and True Video. True Video definitely produces the soap-opera effect. True Film however is much more subtle. Even on the fourth of five presets, I could barely tell it was on. It does improve motion resolution noticeably without flattening the picture like most other displays do. Overall I found it very impressive. Additionally, there is a 120Hz mode for 24p signals. The default is 96Hz which looked fine to me. If you notice flicker, bump it up to 120Hz. Also, for those few viewers who experience DLP rainbows, the color wheel can be set to run at 6x rather than 4x. Since I don’t see the rainbows, there was no effect on the image to my eye.
The rest of the menus contain the convenience settings for the HC8000D-BL. Anamorphic lenses are supported for both 2D and 3D and there is a dedicated menu for computer signals. You can adjust the image position, sync and tracking, overscan, and the colorspace input. These settings all apply to the analog inputs.
With calibration complete for both 2D and 3D, it’s time to see what some actual content looks like!
The Mitsubishi HC8000D-BL 3D DLP Projector In Use

I recently added the superb Blu-ray restorations of the original Star Trek series to my library. These seem a perfect test for any display given their natural color palette, consistent contrast, and amazing detail. The HC8000D-BL did not disappoint. Color was beautifully saturated and natural as could be. These discs are not quite perfect thanks to some poor quality film elements; and they showed themselves. I firmly believe that a display should put out exactly what’s on the disc; no more and no less, and the Mitsubishi delivers. Aside from a barely higher black level, the picture looked every bit as good as my reference Anthem LTX-500. The clarity was the thing I noticed most. DLP is typically the sharpest projector type given its single-chip design. Thanks to that fact and an excellent lens, this projector renders one of the clearest images I’ve ever seen.
Skyfall boasts a reference-level transfer and it looked superb on the Mitsubishi. The color palette is mostly cool in tint; which can result in a flat picture, but not so here. Every detail, every dimensional cue, and every speck of dirt, was handled beautifully. With all the fast action, I took time to experiment with the Frame Rate Conversion feature. I found it one of the best implementations of frame interpolation I’ve used to date. The effect is quite subtle and unless you use the True Video mode, it never suffers from the soap-opera effect. There are five settings and even the maximum still looks natural and film-like.
Harry Potter and the Deathly Hallows, Part 1 is my favorite torture test for shadow detail. Pretty much this entire film takes place in the dark and many displays will beg for mercy within the first few minutes. While the blacks did look a touch gray, detail never failed to be at the forefront. Thanks to excellent gamma performance and the fixed iris options, I’ve rarely seen this movie look better. I tried the High Bright mode for Iris 2 and found it did brighten the picture nicely without destroying the projector’s dynamic range. After a time though, I went back to the High Contrast mode and left it that way for the remainder of the review. I also tried the auto iris options and found they really weren’t necessary. This projector has such great native contrast; I don’t believe the auto iris adds anything to the mix.
3D Viewing

For those of you who partake of 3D movies, this projector does as fine a job as other DLP projectors I’ve sampled. Thanks to their great clarity, non-existent crosstalk, and great motion processing, DLP presents a superb 3D experience. Mitsubishi has done well here. There is just enough light when you set the fixed iris to High Bright. You’ll want to do a separate 3D calibration because the glasses throw a visible green tint over the image. I watched two very familiar titles, Imax Wild Ocean and A Christmas Carol. The live action Wild Ocean looked great with tremendous depth to the 3D effect. Even the underwater sequences, which don’t really pop on most displays, looked pretty good on the HC8000D-BL.
3D mode has its own separate adjustment for Frame Rate Conversion with five levels. For Wild Ocean it looked better on zero but for A Christmas Carol, a CGI title, I set it to one. This Disney 3D Blu-ray is set almost completely at night and any display not up to snuff for light output will suffer. Even though the Mitsubishi is not the brightest projector I’ve reviewed, this film held up very well. Again, the superb rendering of detail and complete lack of crosstalk saved the day.
The Mitsubishi HC8000D-BL 3D DLP Projector On The Bench
The HC8000D-BL was installed upside-down eleven feet from a Carada Brilliant White screen; which has a gain of 1.4. Readings were taken with an X-Rite i1Pro spectrophotometer off the screen at a distance of 10 feet. Patterns were provided in both 2D and 3D by an Accupel DVG-5000 signal generator and everything was controlled by CalMAN 5.0. Luminance measurements were taken by an X-Rite CA-6X tri-stimulus colorimeter controlled by Progressive Labs software.
The preferred starting point for both out-of-box and calibrated performance is the Cinema mode. This mode utilizes the best presets for color temperature and gamma. The only exception is the color gamut which defaults to Wide. It is slightly over-saturated so I changed it to Normal before beginning the tests. The bulb was at its Normal setting which is the higher power mode. The fixed iris was set to High Contrast and the auto iris was turned off.

The grayscale is slightly warm but tracks pretty evenly from black to white. DeltaE values are between three and five except for 90 percent which is slightly higher. This is a barely visible error and represents very good performance. Gamma tracking is superb right out of the box. Even though there is a multi-point gamma control, I had no need to use it.
Here is the eight-point CIE chart.

This is only a fair result. Red is a little over-saturated and blue is a little under. This affects the magenta secondary which is also under-saturated. Green, yellow, and cyan are much closer to the correct points. Luminances are also quite good for those colors.
To see the rest of the story, check out the saturation sweep.

The colors that perform well on the previous CIE chart also look good on the saturation sweep. They track properly from white all the way to the 100 percent saturation point. Blue and red however are not quite as accurate.
After calibration, I measured the following for grayscale and gamma.

This is one of the best charts I’ve ever seen. DeltaE values are under one for all levels except 20 and 90 percent; and they are both under two. The hump in gamma at 90 percent is a tiny one, only representing a level that’s 0.13 fL too dark. This is about as good as it gets folks.
After spending some time with the color management system, I was able to improve the gamut measurements.

Red is now much closer to its correct point, as is magenta. Blue however is still in the same spot. No manipulation of the saturation or hue controls would bring it into line. I was also unable to get yellow any better. Like most projectors, Mitsubishi’s CMS is effective with luminance but not saturation and hue.
When I see any color points more than a bit off the Rec 709 spec, I like to check the positions of the secondary colors relative to the actual primaries. This tells us whether or not color phases properly from one primary to the next.

You can see the secondaries are right where they should be. If you’re a CalMAN user, you can do this yourself with the color target editor. Simply create a custom gamut using the editor; then select it as the target. The CIE chart will be recalculated automatically.
Here is the post-calibration saturation sweep.

All colors are now quite close to their points at all saturation levels except for blue. And the luminance levels are superb. This has the greatest impact on perceived color accuracy and balance. I was happy to see the luminance controls work so well. Aside from the issues with the blue primary, the HC8000D-BL is a very accurate projector.
3D Performance
A separate 3D calibration was performed with the glasses placed over the meter. Color and gamma were largely the same in 3D, but grayscale required a fair amount of adjustment. The end result was an average DeltaE of 1.86 which is excellent. No adjustments were needed in the CMS to achieve a similar chart to the ones above.
Utilizing the crosstalk pattern from the Accupel, I measured an extremely low 0.21 percent. This is well below the visible level. DLP usually provides the best 3D performance with the fewest artifacts and crosstalk. The HC8000D-BL is a great example of this.
Light Output & Contrast Performance
The HC8000D-BL is not an exceptionally bright projector. Even in its high-lamp mode, the best it could do was 17.215 fL with the fixed iris set to High Bright. There is no penalty for opening the iris. Gamma, grayscale, and color are unaffected. In the High Contrast mode, the max reading was 13.838 fL; still perfectly acceptable on my 92-inch screen.
In 3D the brightness drops to 3.043 in the High Bright iris mode and 2.433 in High Contrast. These numbers sound low, and they are, but the 3D experience was pretty good thanks to the HC8000D-BL’s superb clarity, excellent contrast, and complete lack of visible crosstalk. My only concern would be as the bulb ages, it will dim somewhat. These light levels are just bright enough to enjoy good 3D.
The most impressive thing that came out of my testing was the black level. DLP is not known as the king of contrast but this projector cranked out some impressive blacks. I measured .001 fL in High Contrast, and .002 fL in High Bright iris mode which makes the contrast ratio either 13,838:1 or 8607.5:1. Of all the DLP projectors I’ve reviewed, the Mitsubishi has the lowest black level. That it can maintain it even with the fixed iris open is even more impressive. This excellent contrast adds to the 3D experience as well. In the High Contrast iris mode, the black level was immeasurable.
Video Processing

The HC8000D-BL did pretty well in our standard battery of video processing tests. Below-black was an unusual failure. To render the pattern properly, I had to input an RGB signal and set the HDMI Input option to Enhanced. This option is grayed out with component signals. That means with a 4:2:2 or a 4:4:4 input, all information below video level 16 will be clipped. This won’t impact image quality but it will make it harder to set the correct black level. There was no clipping above white regardless of mode or signal type. The best resolution is seen with RGB signals. While component signals pass the burst test, RGB renders the 1-pixel pattern more clearly. The failure on the Mixed Content Vertical test is due to line twitter in the scrolling text.
Conclusions about the Mitsubishi HC8000D-BL 3D DLP Projector
The Highlights
- Super-sharp image with excellent edge-to-edge focus
- Contrast performance approaches LCoS quality
- Excellent grayscale and gamma performance
- No visible 3D crosstalk
- Compact form factor makes installation easier
My Wish List
- Greater lens shift would increase installation flexibility
- CMS adjustments are not enough to correct all color errors
- Make the glasses larger, lighter, and more comfortable
It seems as though most of my projector reviews start or end with something like, “it’s amazing how much prices have fallen on good-performing projectors.” Well, it now looks like prices have stabilized but the feature and performance level just keeps going up. Projector manufacturers don’t quite operate at the razor-thin profit margins that their television-making counterparts do but there is still tremendous value to be had. It’s difficult to recommend a projector costing more than $3000 for a small to medium theater because there are so many good ones that cost less than that. Mitsubishi has brought an excellent product into a relatively crowded marketplace. While the light output lags a little, color accuracy and image quality are up there with the best. Its performance is solid and picture looks fantastic. This is truly the best DLP I’ve seen to date for contrast. With a black level approaching LCoS territory, you will be very satisfied should you decide to put an HC8000D-BL in your theater.