Introduction
As I’ve read reviews for displays for a good part of the past 20 years, I’ve always seen references to how close the display will come to the reference points for grayscale and color. In the past, most end users were only able to access certain controls on a TV and using a disc such as Video Essentials, you could do a pretty good job adjusting those controls on your own to get your TV as close as you could. You could always hire an ISF professional who would be able to come out with his tools, and his access to the service menu in the TV to make more advanced adjustments, but people often scoffed at paying the $300 and up that this service would run, and after the tech left there was often no way to tweak these adjustments yourself if you decided that, even if it wasn’t accurate, you wanted the picture to look different.
Now however, many displays and projectors are shipping that give end users access to a full featured color management system, which allows you to adjust far more that Brightness and Contrast. However, these advanced controls take far more skill to use than previous settings, typically a minimum of a color meter and a software package to help analyze those results. To take a look at what consumers can use to help get more accurate results from their sets, I evaluated three different software packages, and two hardware tools, along with a friend, to see how accurate we could get our displays. We used ColorHCFR (free), ChromaPure ($200, which includes 1 measurement meter), and CalMAN ($200 for home edition, $500 for enthusiast) for our software packages, and an i1 Display LT and i1 Display Pro for our meters. The displays that we calibrated where a Samsung PN50B650 50″ plasma, and a JVC RS25 projector.
ColorHCFR
The first calibration program I used was ColorHCFR, which is a free software package that anyone can download, and supports a wide variety of sensors. With a sensor such as the i1LT, you can get going in calibration for under $150, but how easy is the process, and what kind of results can you achieve? There are a couple of good guides available on the web for using HCFR, which is very useful since the majority of the program support files, and the official forums, are in French. Additionally, the software has not been updated in over a year at this point, so no one is ever really sure when support of the software, or support for new meters, will stop. For my use of this, I followed the guide that Kal at CurtPalme had put together, and as I’ll refer to that some in this review it could be good to look it over as well.
While ColorHCFR is powerful and fairly flexible in what it can support, it also isn’t the most intuitive software to use. Many of the choices you are presented with (such as Display) have a list of choices that aren’t explained to you, but if you pick the wrong one, it will completely mess up your results, and your calibration won’t be correct. It also doesn’t provide you with a logical workflow of how you would go about calibrating a display. All of the measurements are there, but you’ll need to know in what order you should take the measurements, and how you adjust the settings on your display to fix those results. Really, without the guide from CurtPalme I would have been lost during my first calibration and not known what to do. Now that I’ve done this a few times, it’s easy for me to come into ColorHCFR and know what I need to do, but for a first time user, it’s a very daunting interface.
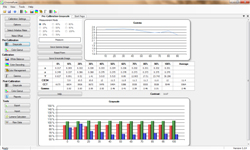
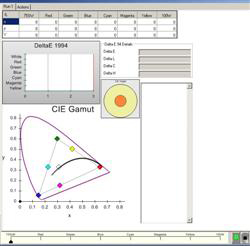
That said, once you have any idea of how to get around inside of ColorHCFR, and what you need to do to fix your measurements, it is a very quick and powerful tool. Everything you need is presented on one screen, and it includes it’s own internal pattern generator, so if you have a laptop with an HDMI or DVI out, you can easily connect your laptop to your display and it will cycle through the patterns and take the measurements for you. If you don’t have this, then there are test patterns available for you to use, most notably a disc on the AVS Forum that users have created that is specifically designed for ColorHCFR, CalMAN, and ChromaPure. However, going from pattern to pattern, remembering to pause the Blu-ray disc, can get very tiresome, and takes far longer than using an automated pattern generator, so if you are using a laptop, I’d recommend getting a USB to HDMI adapter for $50 to make the process far, far easier on yourself.
Once you take measurements, they are easy to flip through using tabs at the bottom of the window. This makes it quite easy to look and see what you’ve already fixed, and what you still need to go back and work on some more to get it right. You’ll often have to flip back and forth, making sure to measure things again after making later changes, as when you adjust one thing, it can easily affect other things that you might have already set. You many only need to adjust it a tiny bit now, but they could easily require it. Also, one thing that is lacking from ColorHCFR is any ability to do before and after measurements, and then any reporting on that. You’ll want to make sure to save your measurements before you start adjusting in a different file if you wish to go back and review the data later. This won’t matter for people that are doing this for themselves and just care about the final result, but for professionals that want to present the end user with a report after their service is completed, it could be a big issue.
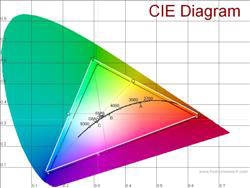
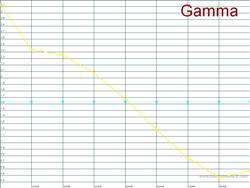
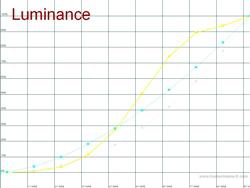
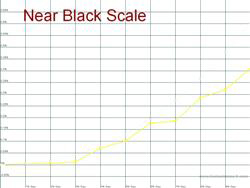
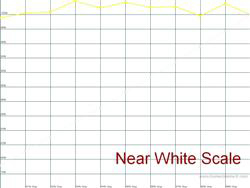
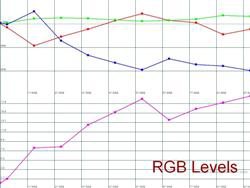
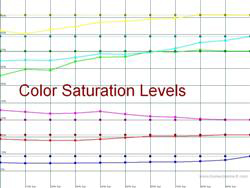
Overall, ColorHCFR is powerful enough to get the job done, and with it’s free entry fee, support guides available online, and large community of people using it, the cheapest way to calibrate your display as all you need to provide is the meter. However, it is not the easiest tool to figure out, doesn’t have a workflow for you to do, and lacks any sort of reporting feature. Unfortunately as you can see in the attached graphs, when you save a graph inside of ColorHCFR, the reference measurement color is light grey on white, so they are a bit hard to read.
ChromaPure
ChromaPure is a new entry into the calibration software game, coming from Tom Huffman, who is a very experienced ISF Calibrator. Designed to be easy to use, and to work with the CMS systems that are available to consumers in recent displays, I was eager to use it and see how the process, and results, compared to those from ColorHCFR.
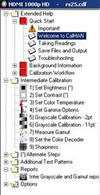
The main difference you’ll find between the two programs is that ChromaPure is designed with a workflow in mind: Get initial measurements from the display, correct the settings in a specific order, and then get another set of results to compare. Unlike the very free form workflow that exists in ColorHCFR, this makes it pretty easy to sit down and do a new calibration from Start to Finish, even if you have not done one before, and without constantly referring back to a web guide. Initially, you start by collecting a set of measurements for your grayscale and color gamut. As everything is influenced by the white balance and grayscale, it’s what you really need to correct first, otherwise the colors will not be right, no matter how much you try.
The order that ChromaPure leads you through your calibration is: White Point, Color Decoding, Color Management, and Gamma. However, before you do either of these you should set the Contrast and Brightness of your display. Brightness is typically set using a PLUGE pattern, and if you have a light meter as you would when you use these programs, you can set the Contrast by determining the level of light you want from your display, and targeting that. For example, I wanted to get between 35-40 ftL from my Plasma, so it was easy to see even with plenty of light in the room, but not so bright that it was overpowering at night. Unfortunately, this PLUGE pattern and a segment to set this is one thing that ChromaPure is lacking, but when I gave this suggestion to Tom Huffman, he was very responsive to the idea, and it will be in a future version soon. You can set the Contrast by doing a continuous reading for 100 IRE in the Precalibration Grayscale section, but there is no PLUGE that you would need to set brightness correctly.
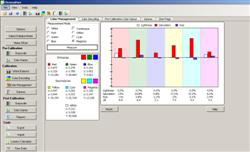
For the White Balance, on my Samsung I set a 30 IRE and an 80 IRE in the color decoder. The graphs that are provided in ChromaPure made this easy to hit, and the Red, Green, and Blue bars match up to the settings that you would adjust in a consumer CMS, which makes it easy to see where you are off and correct it. The measurement smoothing option is great as well, since readings will vary a little bit, and the average is really what you want to use at the end to get it right. Next up is Color Decoding, where you make the initial adjustments using Color and Tint controls. Some displays only offer these and not a full CMS, so these might be the only options you have to correct color, and in this case it will get you as you can with Red and Cyan, and hopefully that will help with the others. Thankfully, most displays are starting to come with more options, which you will use in the Color Management section.
Color Management will show you all the errors in your colors, broken down into Lightness, Saturation, and Hue, with the overall DeltaE (the overall error) for the color. Why this is far more helpful than in ColorHCFR is you can see where the error is for these elements, as this is how most CMS systems work to correct a color. Then you easily know what to raise, what to lower, and can see the results quickly as you work. Unfortunately, my Samsung uses a different model (R, G, and B values), which correspond to one of these items, but it varies by color and so it took a bit of work to get it done. Thankfully, when I mentioned this to Tom, he’s going to include a toggle in the future for Samsung displays so that the readings will indicate R, G and B instead of Lightness, Saturation, and Hue, which would have cut my time down a bit. Overall, this was incredibly well designed, and easy to use, and I never had a question about what to do.
The Gamma section will let you see what the Gamma is for your display. If you can adjust your Gamma on a point by point basis, such as in the JVC RS25 that we used, then you can dial in the points individually, and on the RS25 it includes 5% and 95% values, which are used by that popular projector. As I just had a few set Gamma modes, I tried those and did a measurement until I got the one that was closest to 2.2, and there were no other adjustments that I could make. However, this was a limitation of my CMS, and not the software, and hopefully more displays will allow adjustable Gamma points in the future. I should point out that with version 1.2 of ChromaPure, it now has a built in pattern generator that let me use the HDMI output of my laptop to calibrate the display, and the software would automate taking readings with the meter as well, which made for a very fast, simple process.
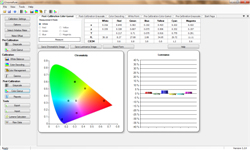
Once this has been completed, you will take Grayscale and Color Gamut measurements to see how your previous settings compare to the updated settings. These are then available in a PDF report, either short or long, that you have for reference, or if you are calibrating for someone else, you have a report that you can leave for them. You can’t adjust anything on this report, but it includes all of the data you are after, even if it is fairly long. My reports are attached, and you can see how much of a difference ChromaPure made with my display, and how accurate I was able to get it using the software and an i1 DisplayLT.
If you can’t tell, I really loved using ChromaPure. It was simple, powerful, and fast. With the integrated pattern generation features, it sped up my calibrations by a ton, so that I could do one in under an hour without a problem. Tom Huffman was also very responsive, answering all of the questions that I had, and taking all of my suggestions to heart, including some in version 1.2, and letting me know that other suggestions will be included in future versions. The software is still very new, so there are some things missing that I would like to see (A sharpness pattern, a PLUGE pattern for setting brightness, and a more intuitive screen to help you set the correct peak output level for your display), but I’m sure those will be added as quickly as Tom can. If I was starting with nothing, and wanted to calibrate my own displays, I would purchase the i1 Display 2 with ChromaPure package, as it’s an easy way to get started and get great results if your display gives you access to a full CMS.
CalMAN
CalMAN has been reviewed by Secrets recently, so I’m not going to go over it in depth, as that review will do it for you. What I will do is compare it to ColorHCFR and ChromaPure as to their similiarities and differences.
After we calibrated the Samsung, we tried ChromaPure with a JVC RS-25 projector that is at a colleagues house. Since Mark has been using CalMAN successfully for several years, this was an excellent opportunity to compare ChromaPure with what is undoubtedly the most popular consumer and pro calibration software solution on the market. What we have to keep in mind here is that in the end it is all the same data – how it is displayed and how you interact with it in each software is what is different.
ChromaPure integrates with the JVC projector’s CMS exceptionally well. The JVC color management system has independent settings for hue, saturation and luminance for each primary and secondary color, unlike the Samsung which uses RGB. This means errors we were targeting to correct inside of ChromaPure corresponded perfectly with what we were seeing on the JVC’s menu system.
Mark was very happy with ChromaPure, but noted several differences between it and CalMAN. With ChromaPure we are seeing Tom Huffman’s approach to calibration. We see the data the way that he likes to see it be organized and displayed. An advantage to CalMAN is that it is fully customizable. Should you have a particular preference for how you like data to be displayed, you can build this using CalMANs custom screens tool. This type of flexibility is not present in ChromaPure. This is a feature that is appealing to professional calibrators, who develop a preferred method to the calibrations that they conduct. Mark didn’t feel that this was a major negative, he has never used the custom menu’s and sticks with the layouts given by CalMAN, but it must be noted.
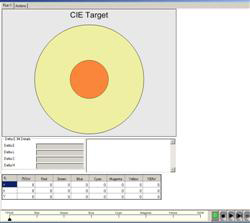
CalMAN is pre-packaged with several “calibration lay-outs” from Novice to Advanced and presents much of its data using a “bulls-eye” approach, vs column graphs that are prevalent in ChromaPure. Instead of seeing each color represented individually (Red Green and Blue for example when you are looking at a grayscale point), CalMAN represents this data in a 3 axis bulls-eye pattern. Errors in any of of the axis will pull you farther away from the bulls-eye – or your target value. This approach works quite well for grayscale and is a very graphically easy way to represent what you need to do. We both found that it was a little tougher for the color calibration, especially on the JVC.
Mark and I both felt that none of the preset calibration layouts in CalMAN presented the Color Management data acquisition (dE, dY, dC, etc) as succinctly as ChromaPure did, especially from an enthusiast vs professional perspective. CalMAN does consider CMS work “advanced” and often beyond the scope of enthusiast calibrators and thus requires a bit more knowledge to work through the data presentation screen then ChromaPure did. All of the information was there, but it was a little harder to see from the graphing exactly what needed to be done. For example: dY numbers tell you that your luminance was off, but it was less clear on CalMAN whether there was too much luminance or too little – dE values are absolute values and so only tell where your errors are and how far your off, not which direction. This was easily identifiable in ChromaPure’s bar graphs which were negative or positive depending on which direction you need to adjust the control. Professional calibrators undoubtedly will have an easier time moving around the data – but we both appreciated how well CMS information in particular was graphically presented in the ChromaPure software.
Which to choose if you don’t have something right now? Only you can tell if you’ll have a preference for the ways in which the two softwares present the data. CalMAN allows you to download a trial version but this version just allows you to see how the software works in a theoretical way – you can play with the software but you can’t actually connect with a meter and take measurements. ChromaPure does not offer a demo, but the website has multiple video’s so you can see how various things are accomplished.
Beyond that, the two software packages do not overlap 100% in terms of functionality or features. ChromaPure offers free point release software updates while major version updates will be around $50, free support and no extra licensing for professionals, while CalMAN makes you pay for support after the first year and future software versions and is expensive for a professional license. CalMAN also has more options for pattern generation: they offer a low cost pattern generator in addition to commercial targeted units like those from Sencore, and also support for USB/IR blasters that will control Blu-ray players using a variety of test discs (including the free AVS-HD test disc available at AVS Forum). ChromaPure does have support for commercial pattern generators, but these are generally too expensive to appeal to the average enthusiast and lacks support for USB/IR based devices like those supported by CalMAN. ChromaPure does include an internal pattern generator that you can display on your display from your computer if you have the proper output, but this requires unplugging wires and trusting that your computer is either outputting the same signal type as your Blu-ray player, or that your display handles them the same. This emulator is definitely nice, but being able to use a Blu-ray player without doing actual rewiring is something that I think is beneficial to the casual user. We have asked Tom about this functionality and it is on the “to do list”, but is currently unavailable.
You certainly can’t go wrong with either package – which one you choose depends on how you assign value to the various differences in features.
Conclusions
With all of these products I was able to get a far more accurate display than when I started. ColorHCFR was the cheapest, but it hasn’t been updated in over a year, doesn’t have a well designed workflow, and lacks support for some recent meters. ChromaPure and CalMAN were both fantastic solutions for the home theater enthusiast. ChromaPure is very straight forward in it’s process, but lacks the customization that CalMAN offers. However, for the home user that simply wants to calibrate their display quickly and easily, it’s very easy to get going and get fantastic results in a single evening, with no steep learning curve. However, if you are going to be working with the program on a daily basis, and want it to fit how you work, as well as customize the information that you give to clients in the reporting tool, then CalMAN will have the features that you are looking for.
How does this compare to having an ISF Calibration done? ISF Calibrators are going to be able to access the service menu in your TV, which should allow them extra adjustments to get the picture dialed in even closer to reference. Additionally, many TV’s are starting to include ISFccc modes that end users don’t have access to, but allow an ISF technician to setup separate Day and Night modes, so you can easily have a perfect picture if it is bright or dim in your room, and they will often calibrate multiple inputs so if you have different source components that have different color profiles (SD and HD content have different color spaces, which some components can handle differently), then they will set the inputs up to ideally match the source component. Also, it’s far easier to sit back and watch someone do this for you, then to spend hours, or even days, trying to dial it in perfectly, as I must have spent a week or two the first time I tried to use ColorHCFR.
Finally, if you pay $450 for a calibration, you can be sure that the ISF Tech is going to show up with far more accurate measurement equipment than if you buy the $350 CalMAN or ChromaPure packages for home users. Some of the difference is speed, but all the calibrators I have talked to get their instruments adjusted yearly, as the meters can drift over time leading to less accurate results. Additionally, the meters that an ISF technician would use start at the cost of an i1Pro ($800) and move up to thousands of dollars with models from Orb, Photo Research, and Minolta.
In the end, these home packages and consumer level meters allow you to get your picture calibrated closer than you ever could have on your own before. Using Video Essentials or AVIA Gude to Home Theater might help you deal with some basic settings in your TV, but the adjustments they can do don’t compare to what’s possible with a CMS and a meter. If you have a DIY attitude, I would recommend giving it a try, as you will probably find the results that you can achieve very pleasing. You also might see how much of an improvement it can make, and then want to bring in an ISF technician to do a full calibration, since for the cost of a couple other tweaks (nice cables, a better power source) you can get an improvement that no one will be able to deny!
————————————————————-
Chris Heinonen is a Senior Editor on the SECRETS Team.
Mark Vignola is the co-author of this feature on DIY Calibration. He holds a PhD in Molecular Genetics and is a research scientist at the Duke University Medical Center. Mark is an almost full-time video enthusiast, particularly interested in video display science and acoustics of home theater.


